
Into The Hive combat mechanics: damage, firing stats and status effects
Last updated:
Read weapon stats with their units and loadout conditions to compare damage correctly. Distance, weak-spot hits, Augment triggers and firing downtime all affect what happens after you pull the trigger.
For damage per round D and fire rate R in RPM, nominal firing DPS is D × R / 60 if every round hits for D damage and firing stays uninterrupted. Level 1 AR-01 gives 80 nominal firing DPS before reload downtime. EL-03's 10/Tick means damage per tick, not per second. SMG bonuses depend on distance, weak-spot bonuses require weak-spot hits, and triggered Augments follow their own intervals or chances. Freezing and brief stuns provide control separately from damage.
Damage units and firing systems
Open Equipment, select a weapon, and read its Damage, Fire Rate, Magazine, Reload and installed Augments together.
| Stat | Meaning | Unit |
|---|---|---|
| Damage | Damage per round | Damage |
| Damage /Tick | Damage per tick | Damage/tick |
| Fire Rate | Firing frequency | RPM |
| Magazine | Ammunition capacity | Rounds |
| Reload | Reload time | Seconds |
| Heat | Heat-based firing resource | Heat bar |
RPM means rounds per minute. Divide it by 60 to get rounds per second. A damage value marked /Tick belongs to each damage tick; it is separate from how frequently the weapon fires.
Compare weapons at the same level and with matching Augment conditions. A configured equipment panel and an upgrade preview describe different conditions: a Level 13 MG-03 with three occupied Augment slots displays 18.46 Damage, while its upgrade preview reads 14.2 → 14.7 for Level 13 → 14 before Augment bonuses. Keep those values attached to their respective configurations.
MG-03 uses Heat in place of a conventional magazine. Firing fills its HEAT bar; a full bar starts COOLING, and completing that cycle returns the display to HEAT. Cooling interrupts its firing output even though there is no conventional magazine reload.
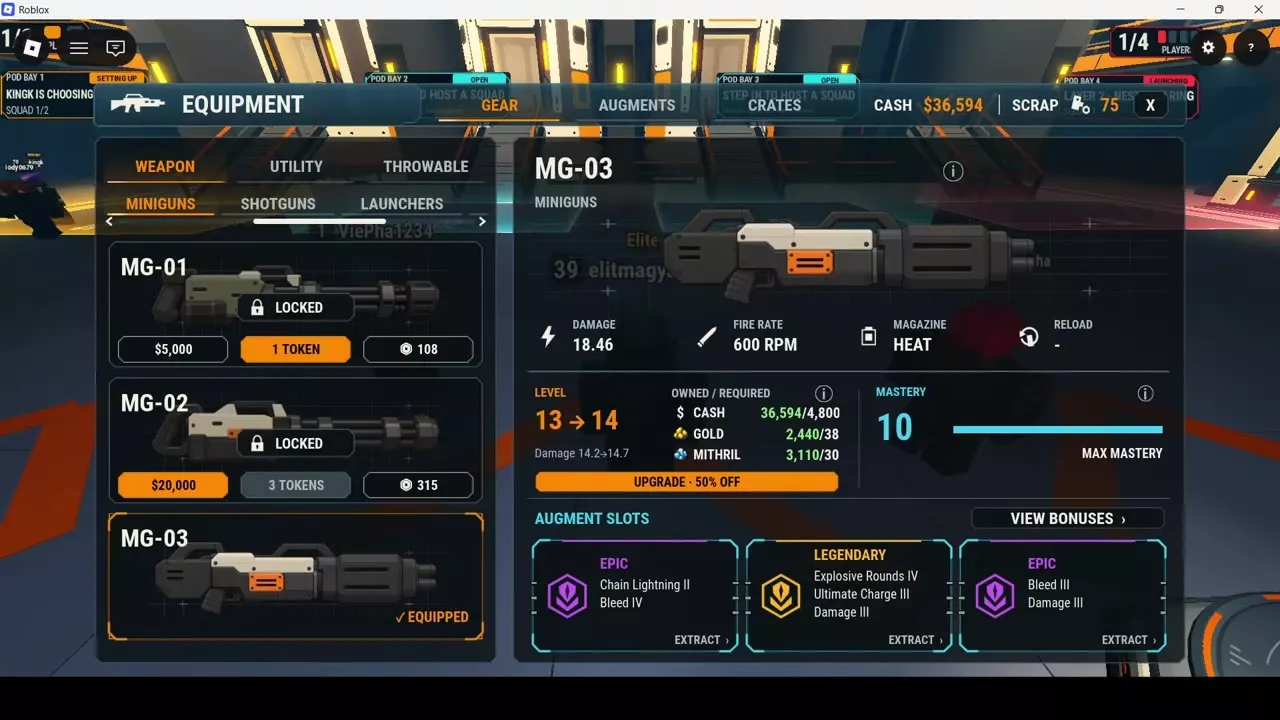
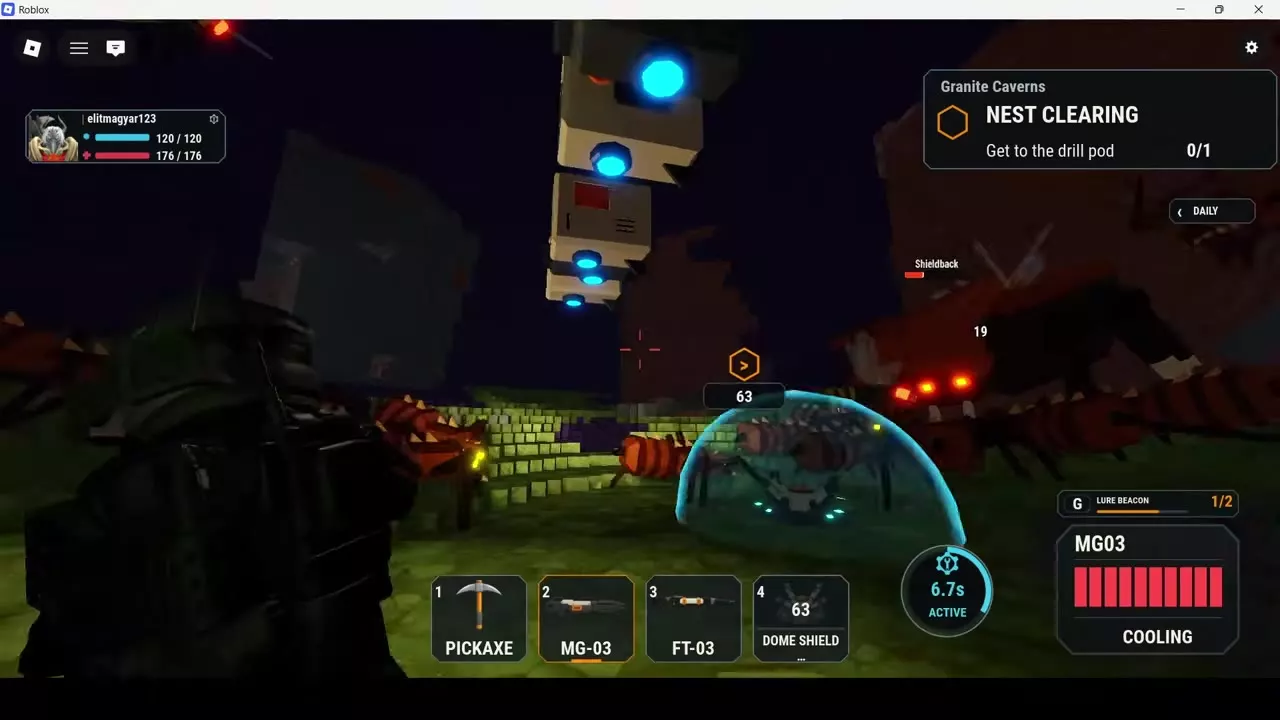
Nominal firing damage
Nominal firing DPS = damage per round × RPM / 60. Use damage and fire rate from the same weapon level and loadout. This calculation assumes every round hits for the stated damage, with no reload, cooling or other firing interruption.
For Level 1 AR-01:
- Convert 600 RPM to rounds per second: 600 / 60 = 10.
- Multiply by its 8 damage per round: 8 × 10 = 80 nominal damage per second.
AR-01 also has a 30-round magazine and a 2-second reload at Level 1. The 80 figure describes uninterrupted firing; it excludes that reload downtime. Distance bonuses, weak-spot hits and additional triggered damage also sit outside this simple calculation.
EL-03's 10/Tick cannot replace damage per round in this formula. Its 84 RPM describes firing frequency, while 10/Tick describes repeated damage from its electric ball. Neither value supplies the interval between damage ticks, so 10/Tick does not mean 10 damage per second.
Distance, weak spots and triggered effects
SMG distance bonuses
SMG-01, SMG-02 and SMG-03 gain 50% damage at close range, falling back to base damage at longer range. With base damage B, the full close-range bonus gives B × 1.5. Compare close-range hits with close-range hits rather than treating that bonus as permanent damage at every distance.
The November 14 update extended the bonus range by 20%, with distance measured from the edge of the bug's body. That change extends where the bonus applies; it does not add another 20% damage.
Weak-spot hits
Weak Spot Damage III grants a 35% weak-spot damage bonus. Aim for weak spots to activate it. Ordinary hits do not receive this trait's bonus, so its value depends on landing the required hit location.
Trigger intervals and chances
| Trait | Level | Trigger rule | Effect |
|---|---|---|---|
| Chain Lightning | I | On hit; 0.5 s minimum | 2 arcs; 15 damage each |
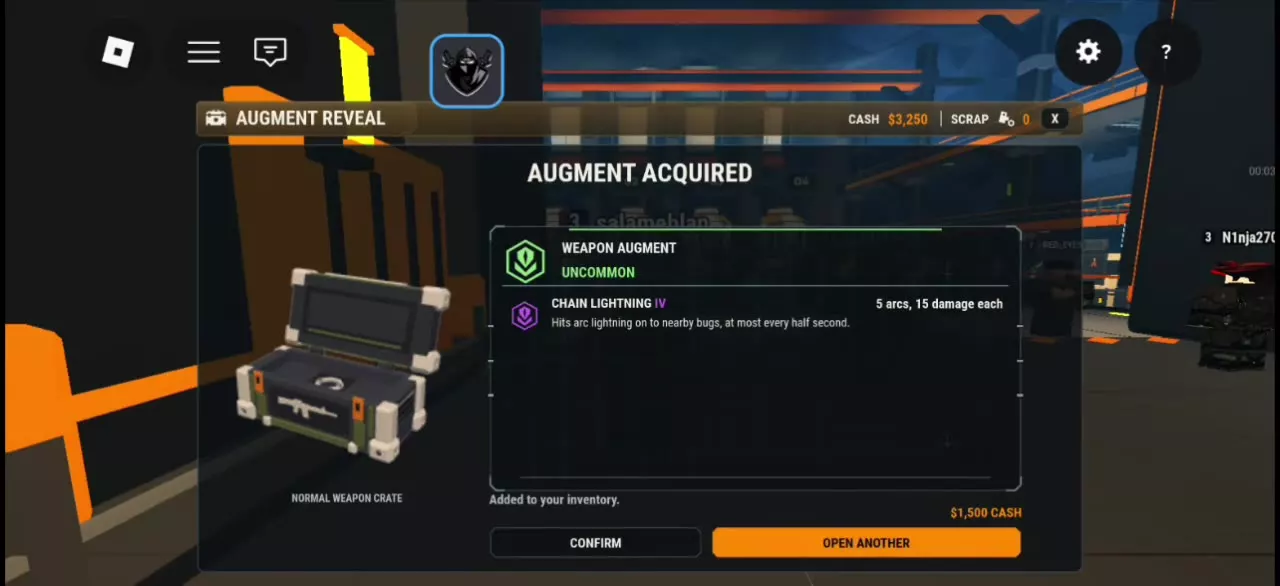
| Chain Lightning | IV | On hit; 0.5 s minimum | 5 arcs; 15 damage each |
| Explosive Rounds | I | 10% chance per hit | 3-stud explosion radius |
Chain Lightning sends arcs toward nearby bugs when a hit triggers it. Both listed levels activate at most once every 0.5 seconds. Level IV provides more arcs per activation than Level I; increasing weapon fire rate does not remove that interval. Choose it for additional damage around a target when nearby bugs give the arcs useful targets.
Explosive Rounds I gives each hit a 10% chance to cause an explosion that damages bugs around the target within 3 studs. Extra landed hits provide more trigger opportunities, but a higher RPM does not turn the effect into a guaranteed explosion on every hit or establish a fixed number of explosions per second.
Fire, bleed, shock, freeze and stun
Fire, bleed and shock damage numbers
Fire, bleed and shock damage have separate colored damage numbers. Open Settings and use the status-number toggle to turn those numbers on or off. Keep them visible when you want to distinguish status damage during a fight. For other display options, use Controls and settings.
Burning from FT-01, FT-02 and FT-03 damages nests, an interaction enabled for all three flamethrowers in the November 7 update. Fire therefore contributes against the nest itself as well as bugs around it.
Area freeze and brief stuns
| Equipment | Control effect | Applies to |
|---|---|---|
| Cryo Canister | Area freeze | Bugs in the freeze area |
| Arc Tower | Brief stun per pulse | Small bugs |
| EL-03 | Brief stun on contact | Each bug the ball reaches |
Use Cryo Canister for an area freeze. Its freeze radius doubled in the November 7 update compared with the previous radius.
Use Arc Tower to interrupt small bugs: each pulse briefly stuns them and stops their bites.
EL-03 combines repeated damage with a brief stun on each bug its ball reaches. The ball also slows when near bugs. That slowdown describes the projectile's movement, not an enemy movement-speed penalty. Read its per-tick damage, contact stun and projectile movement as separate parts of the attack.
Weapon and armor conditions
Match a damage benefit to the condition that activates it before choosing a loadout:
- Weapon types and firing mechanics explains model-specific inputs, cooling, electric attacks and other firing behavior.
- Augment traits covers trait levels and equipment compatibility. Check both when selecting an effect for a particular weapon.
- Armor sets and bonuses compares defensive percentages and conditional damage bonuses. Overcharged requires a full shield, Overdrive requires an active ultimate, and Big Game Hunter targets heavy bugs, specials and bosses. Each of these offensive sets trades away some shield.