
Into The Hive throwables
Last updated:
Choose a throwable for clustered bugs, nest damage, freezing, mines or a distraction that opens an escape route.
Into The Hive has five throwables and one throwable slot per loadout. Choose Blast Grenade for clustered bugs, Proximity Mine for mines, Throwing Axe for nest damage, Cryo Canister for freezing, or Lure Beacon to distract small bugs. Browse Equipment > Gear > Throwable, then change your throwable in Loadout. Press G to use Blast Grenade or Lure Beacon with an available charge.
Throwable choices
Your single throwable slot makes this a choice between damage and control:
- Blast Grenade: Choose it to attack clustered bugs. It comes equipped in the starting tutorial loadout.
- Proximity Mine: Choose it for mine deployment, with Cluster adding small mines outside your mine limit.
- Throwing Axe: Choose it when you want a throwable that damages nests.
- Cryo Canister: Choose it to freeze an area and interrupt a swarm's advance.
- Lure Beacon: Choose it to draw small bugs together while you reposition, escape or attack the group.
Blast Grenade is a straightforward starting choice for clearing crowds. Lure Beacon suits a loadout that already handles damage but needs room to move; Cryo Canister provides freezing instead of redirecting enemies.
Throwable directory
Compare combat roles and Cash and Equipment Token prices below. Open an item's details for its other unlock prices, equipment attributes, Augments and upgrade requirements.
Choose throwables by combat role and unlock cost.
5 objects
|
|
66 damage Level 1 · Throwable Damage I · Throwable Damage I installed | Starting loadout | Clustered bugs | |||||||||||||||||||||||||||||||||||||||
|---|---|---|---|---|---|---|---|---|---|---|---|---|---|---|---|---|---|---|---|---|---|---|---|---|---|---|---|---|---|---|---|---|---|---|---|---|---|---|---|---|---|---|
|
A grenade used against clustered bugs. It deals additional maximum-health damage to non-boss bugs it hits.
TipsThrow with G at clustered bugs. Each non-boss bug hit takes additional damage equal to 10% of its maximum health; use this bonus against the swarm surrounding a boss. |
||||||||||||||||||||||||||||||||||||||||||
|
|
— | — | Mine deployment | |||||||||||||||||||||||||||||||||||||||
|
A mine in the throwable equipment category. With Cluster, it leaves small mines that do not count toward the mine limit.
TipsEquip Cluster to leave small mines that do not count toward your mine limit. |
||||||||||||||||||||||||||||||||||||||||||
|
|
— | — | Throwable nest damage | |||||||||||||||||||||||||||||||||||||||
|
A throwable axe that can damage nests. Thrown axes have an outline.
TipsUse Throwing Axe against nests, and use the outline to locate an axe after throwing it. |
||||||||||||||||||||||||||||||||||||||||||
|
|
— | — | Freezing | |||||||||||||||||||||||||||||||||||||||
|
A freezing throwable. It supports the Cluster Augment.
TipsChoose Cryo Canister for area freezing. It supports the Cluster Augment. |
||||||||||||||||||||||||||||||||||||||||||
|
|
— | — | Small-bug distraction | |||||||||||||||||||||||||||||||||||||||
|
A decoy that attracts Crawlers, flyers, and other small bugs. It creates an opening to reposition or attack the gathered bugs.
TipsThrow the beacon to draw Crawlers, flyers and other small bugs away, then move toward extraction or attack the gathered group with FT-03. Its 24-second recharge begins after the beacon switches off. |
||||||||||||||||||||||||||||||||||||||||||
Equip and throw
- Return to the lobby and open Equipment > Gear > Throwable.
- Select an item to view its attributes, Mastery, Augment slots and unlock options.
- Unlock your choice if it is locked. Proximity Mine and Throwing Axe each offer 2,000 Cash, 1 Equipment Token or 49 Robux as alternative unlock options. Cryo Canister's card lists 2,000 Cash, 1 Equipment Token and 45 Robux.
- Open Loadout and click the throwable slot to change the item carried into your mission.
With Blast Grenade equipped and a charge available, aim toward clustered bugs and press G. Each throw consumes one charge. Lure Beacon also uses G and consumes one charge per deployment.
Damage, freezing and mine interactions
Blast Grenade damage
Each non-boss bug hit takes additional damage equal to 10% of its maximum health. Calculate that bonus separately for every bug hit:
Additional damage per non-boss bug = maximum health × 0.10.
Bosses are excluded from this additional maximum-health damage. During a Brood Mother encounter, aim grenades at the accompanying swarm to use the bonus against eligible targets.
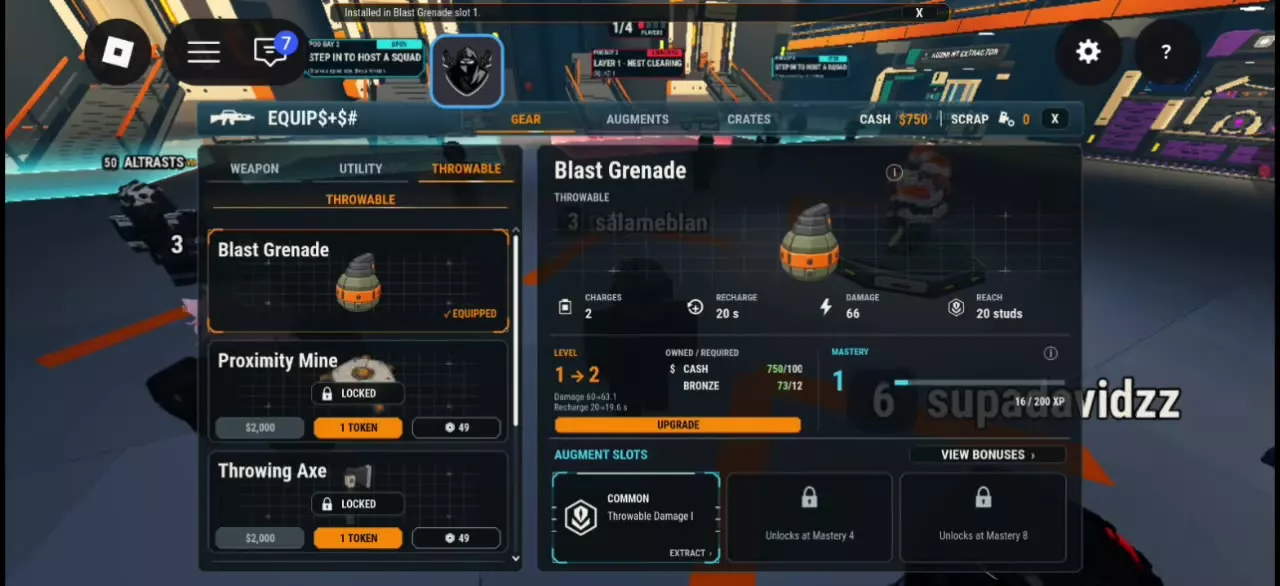
At Level 1 with Throwable Damage I installed, Blast Grenade has 2 charges, 20 seconds recharge, 66 damage and 20 studs Reach. The 66 damage already includes the Augment's +10% throwable damage effect; do not add that bonus to 66 again.
Throwing Axe and nests
Throwing Axe damages nests. After throwing it, use its outline to locate it. The November 7 update increased its damage by 50% compared with its previous damage.
Cryo Canister and Cluster
Cryo Canister freezes an area and supports the Cluster Augment. Its freeze radius doubled in the November 7 update.
With Cluster installed on Proximity Mine, the small mines left behind do not count toward your mine limit. This makes Cluster useful when you want additional small mines without consuming that limit. See Augment traits for equipment compatibility and other effects.
Create space with Lure Beacon
Lure Beacon attracts Crawlers, flyers and other small bugs only. Use it to redirect those enemies while you move, rather than relying on it to pull bosses or other large threats away.
- Equip Lure Beacon and press G with a charge available. In a two-charge loadout, one deployment reduces the counter from 2/2 to 1/2.
- Move away while the small bugs gather around the beacon. During extraction, use the opening to continue toward the drill pod.
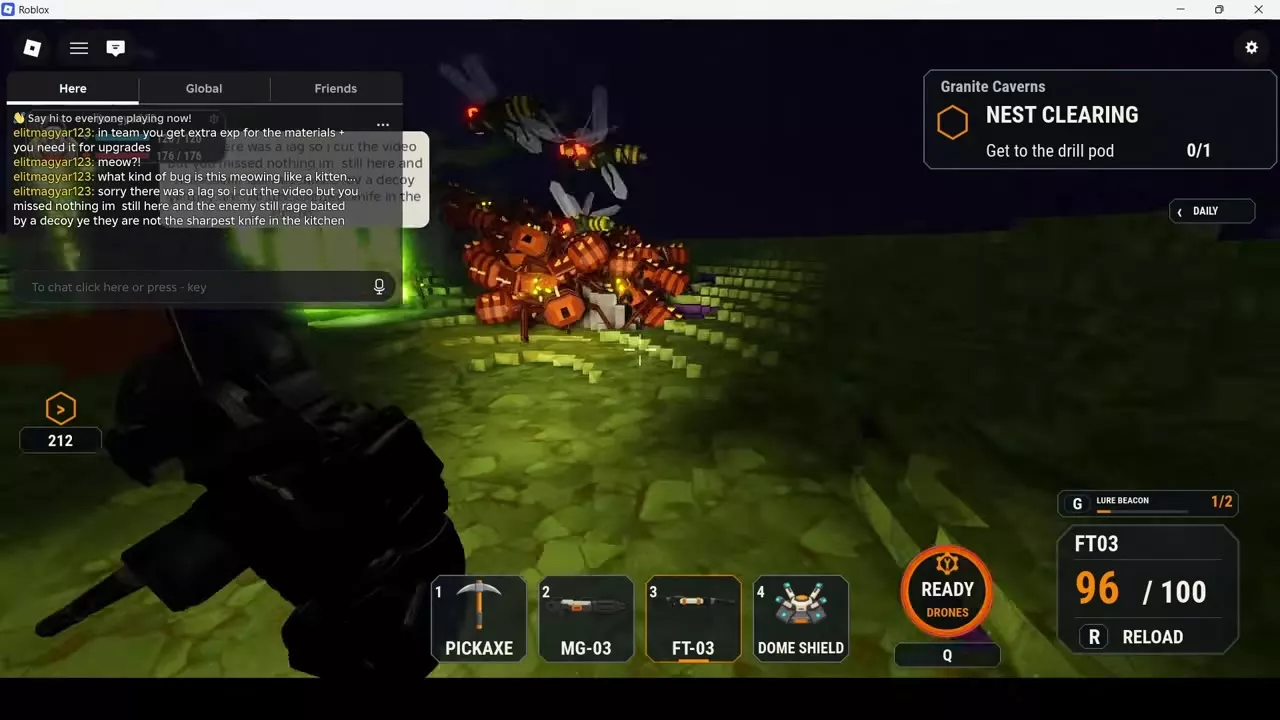
- If you want to clear the group, turn back from an open position and attack the gathered bugs with FT-03.
The beacon's 24-second recharge begins after it switches off, so throwing it does not immediately start that recharge.
The Level 16 three-Augment configuration has 2 charges, 14.87 seconds recharge and 67.5 studs Reach. That recharge belongs to the configured loadout. Its full slot setup and progression values are in Lure Beacon's directory details; the solo Layer 1 Insane Nest Clearing loadout explains how it works alongside FT-03, MG-03 and Dome Shield.
Augments and extraction
Throwable Damage I grants +10% throwable damage. Install it in an available Blast Grenade slot. Slot 1 is available in the starting configuration; Slot 2 unlocks at Mastery 4, and Slot 3 at Mastery 8. The grenade's Level 1 → Level 2 upgrade requires both 100 Cash and 12 Bronze.
Equipment upgrades and Mastery are separate progression tracks: paying for an equipment level does not replace a slot's Mastery requirement. Use equipment upgrades and Mastery to follow those tracks, and Augment management to install, extract or transfer a compatible Augment.
For an escape, use Lure Beacon's small-bug distraction to create room to move, then follow the route to the pod. The extraction guide covers finding the route, clearing blocked passages and boarding.