
Into The Hive Wiki

Last updated:

LAST UPDATED NOV 15, 2026

Mine ore, fight bug swarms and complete missions in randomly generated caves, then extract with resources to improve your equipment for solo expeditions or squads of up to four.

GenreShooter
Visits4M+
Favorites104K+
CreatorTo The Earth's Core
Released2026-10-21
Updated2026-11-15
Into The Hive official artwork GAMEPLAY

Beginner Route

3 STEPSFull guide →
1

Prepare at the depot

Finish Rusty's tutorial and return for the first-drop reward of 1,000 Cash and one Equipment Token. Take the depot tour for two free Weapon Augments. Prepare AR-01, PI-01, Sentry, Blast Grenade and Pickaxe, and install compatible Augments in available slots before entering a queue.

2

Complete a mission and extract

Use Pod Bay to host or join an expedition and choose an available difficulty. Mine ore, follow the mission objectives and dig through blocked passages with Pickaxe. After completing the objective, enter the extraction pod and remain inside until Extracting.

3

Improve your loadout

Back at the depot, upgrade the weapon you use regularly and transfer useful Augments to compatible equipment as you progress. Save later purchases for a combat role you need. Follow the beginner guide for the complete preparation and spending route.

Early Equipment Progression

Each upgrade cost applies to moving from the preceding level to the displayed level and requires Cash and Bronze together. Taking AR-01 from Level 1 to Level 3 costs 650 Cash and 75 Bronze in total, raising damage from 8 to 9.

Equipment level and Mastery advance separately. AR-01's second Augment slot requires that rifle's Mastery 4; its third requires Mastery 8. Buying upgrade levels does not unlock those slots. Use equipment upgrades and Mastery to follow both progression tracks.

NameDamageCash requiredBronze required
AR-01 · Level 1
8 damage
AR-01 · Level 2
8.5 damage
250 Cash
30 Bronze
AR-01 · Level 3
9 damage
400 Cash
45 Bronze
More details
StatValue
AR-01 · Level 2 · Cash required
250 Cash (Upgrade from Level 1; also requires 30 Bronze.)
AR-01 · Level 2 · Bronze required
30 Bronze (Upgrade from Level 1; also requires 250 Cash.)
AR-01 · Level 3 · Cash required
400 Cash (Upgrade from Level 2; also requires 45 Bronze.)
AR-01 · Level 3 · Bronze required
45 Bronze (Upgrade from Level 2; also requires 400 Cash.)

Codes

3 ACTIVEAll 6 codes
THXFOR1MVISITSUnconfirmed
HALLOWEENUnconfirmed

Wiki Reference

Quick Data

Augment CratesFull table →
Name Ten openings Single opening
Premium Throwable Crate 400 Robux
49 Robux
Premium Utility Crate 400 Robux
49 Robux
Premium Weapon Crate 600 Robux
69 Robux
Normal Throwable Crate —
1,000 Cash
Normal Utility Crate —
1,000 Cash
Normal Weapon CratePaid opening —
1,500 Cash
Summary figures only. Bars compare rows in this table.
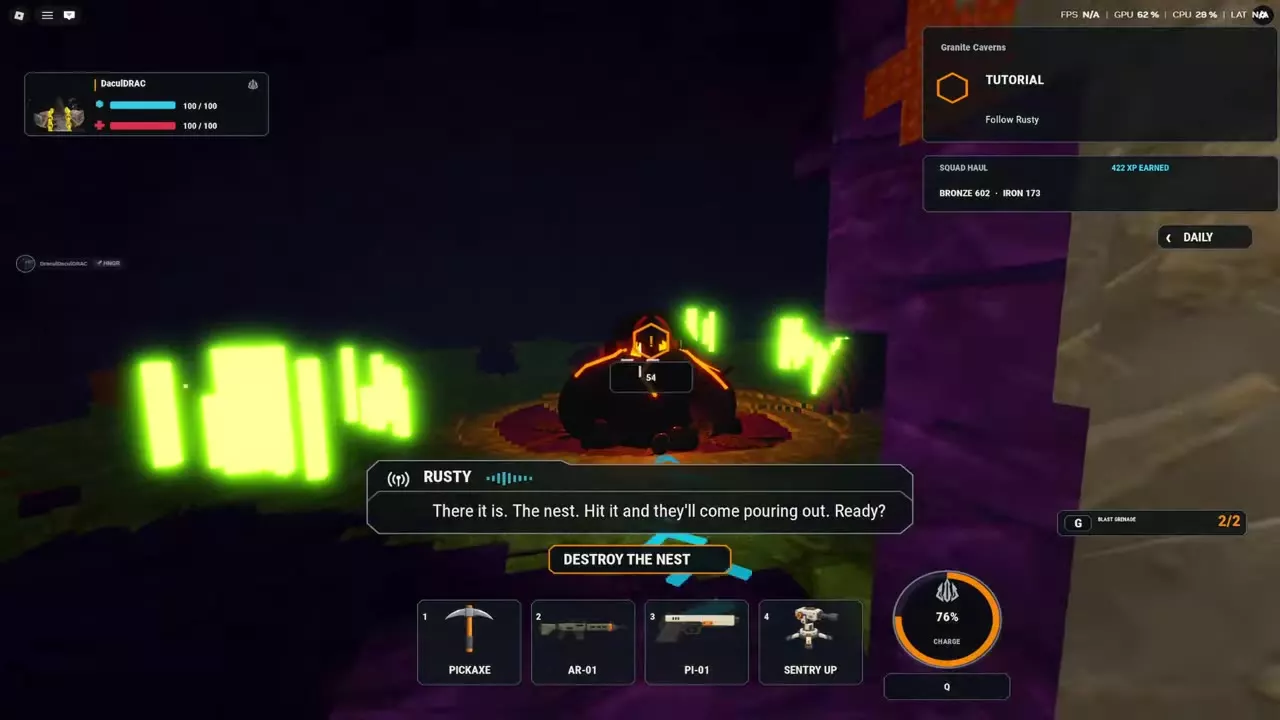
The glowing orange Nest beneath its objective marker and DESTROY THE NEST prompt.

Rusty tutorial walkthrough

Follow Rusty and mine the deposits he identifies. When dirt blocks the tunnel, equip Pickaxe and left-click to open a passage.

At DESTROY THE NEST, keep attacking the Nest while handling its bugs; clearing the surrounding enemies alone does not advance the objective. Continue until NEST DESTROYED. During the Brute encounter, follow SHOOT ITS LEGS, then take the extraction route back to the drill pod after the story sequence.
Depot tour, firing range and group reward

Try equipment before spending your savings. Either of the depot's two firing ranges lets you test locked weapons, utility equipment and throwables against paper targets or live bugs from any layer and difficulty.

Finish your equipment upgrades, Augment installation and armor selection before entering Pod Bay. Loadout, Equipment, Armor and Shop lock while you are queued.

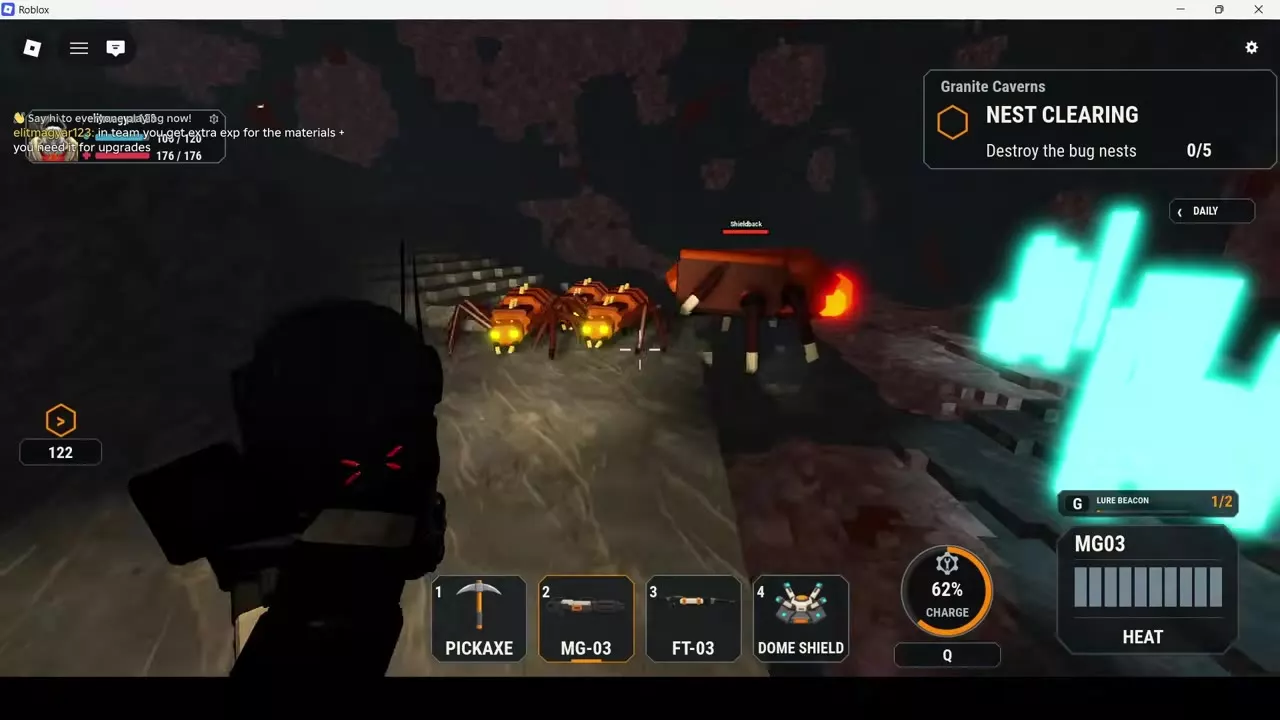
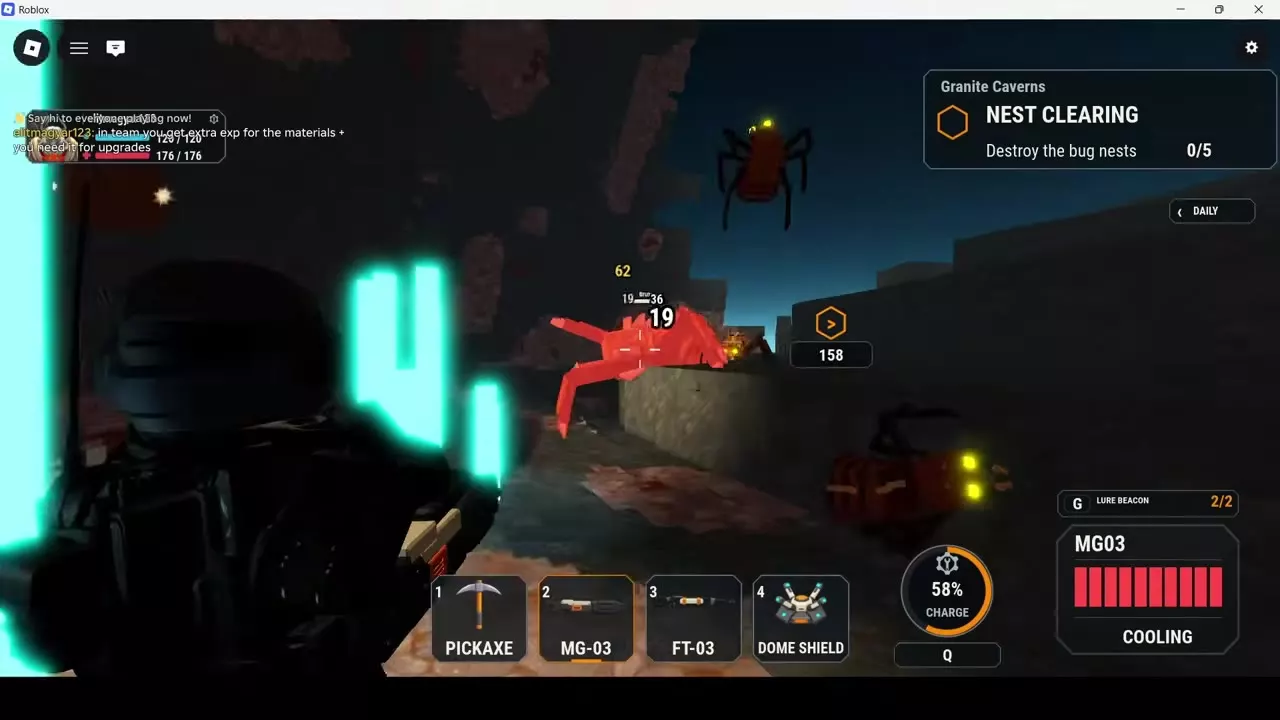
MG-03 displays a full red heat bar and COOLING as bugs approach.

Weapon types and firing mechanics

MG-03: Watch its HEAT bar. A full bar starts COOLING; use the interruption to reposition and resume fire when HEAT returns.

EL-02: Since the November 14, 2026 rework, holding the trigger loads additional rounds through successive charge steps, up to the whole magazine. Those rounds combine into a stronger, longer-reaching beam that also damages nests behind bugs it passes through.

PS-01: Choose its short, wide pulse for close-range control: it knocks small bugs back and stuns large bugs.

Weapon Price List

Weapon unlocks offer Cash, Equipment Tokens or Robux as alternative payments. Pay one listed option, then select Equip to use the weapon.

Weapon choices Cash option Token option
EL-02 or FT-03 12,000 Cash each 2 Tokens each
MG-02, MG-03 or GL-03 20,000 Cash each 3 Tokens each

Choose the role you want before spending: an overcharged beam, sustained flames, heat-based gunfire or repeated explosions. Saving three Tokens for a desired 20,000-Cash weapon preserves more Cash than spending one Token on a 5,000-Cash unlock.

Weapons DamageCash unlockRobux unlock
GL-01 120 damage5,000 Cash119 Robux
EL-02 90 damage12,000 Cash219 Robux
SMG-02 50 damage5,000 Cash119 Robux
SMG-03 50 damage5,000 Cash119 Robux
GL-03 40 damage20,000 Cash349 Robux
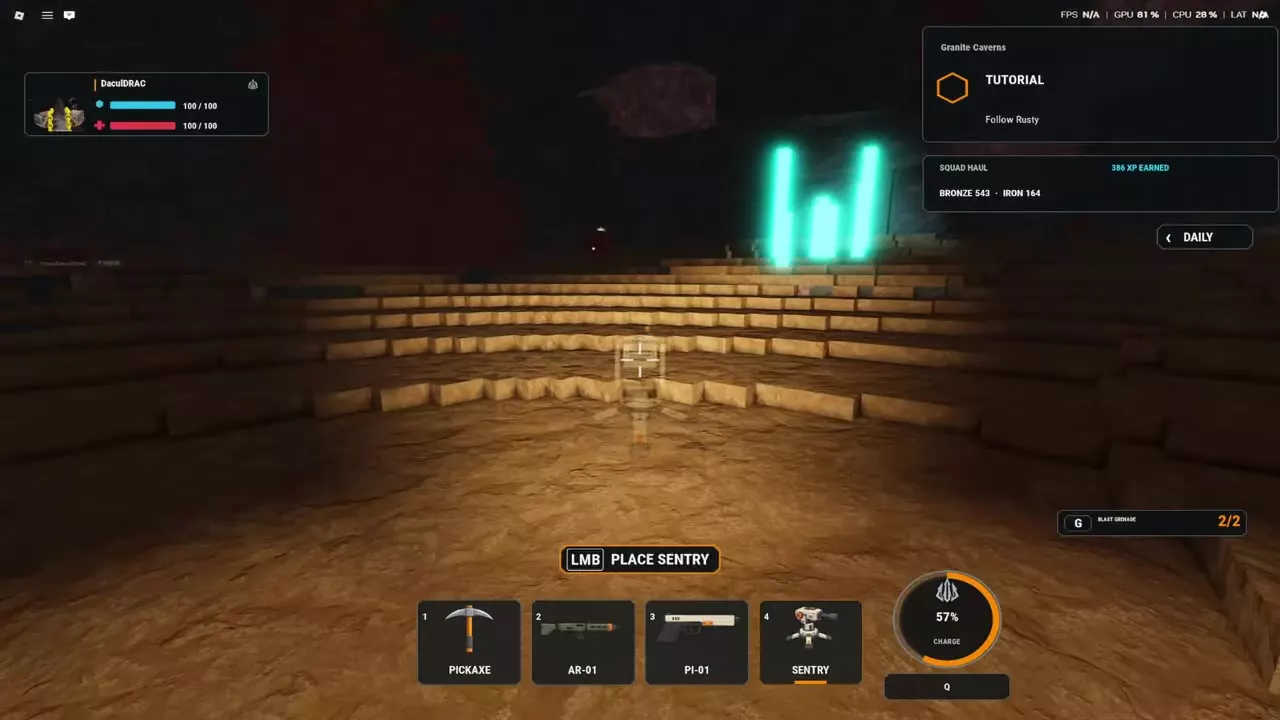
Sentry placement preview on the ground with the left-click placement prompt

Deploy, move and repair utility equipment

With Sentry equipped and the default hotbar, press 4, aim its preview at the ground and left-click to place it. SENTRY UP confirms deployment; switch back to your weapon or Pickaxe while it provides cover.

Moving a turret takes a 2-second wait and preserves its damage. To repair it, leave the damaged turret packed for 30 seconds before deploying it again.

If placement fails, the turret stays in your hand and displays the reason. Read the message and choose another position.

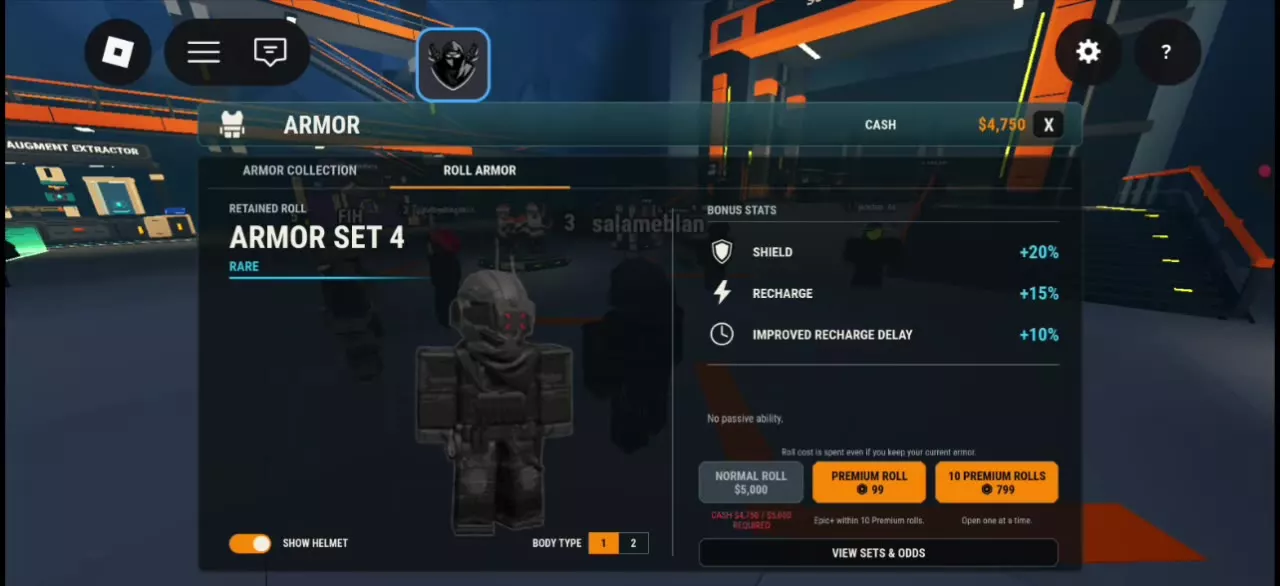
Armor Set 4's Bonus Stats panel with Shield, Recharge and Improved Recharge Delay listed separately.

Armor sets and bonuses

Read Shield, Recharge and Improved Recharge Delay separately. Armor Set 4 provides +20% Shield, +15% Recharge and +10% Improved Recharge Delay; these bonuses do not combine into one Shield percentage.

For offensive armor, choose a damage condition you can maintain:

  • Overcharged: full shield.
  • Overdrive: an active ultimate.
  • Big Game Hunter: attacks against heavy bugs, specials and bosses.

All three offensive sets sacrifice some shield for their conditional damage bonus.

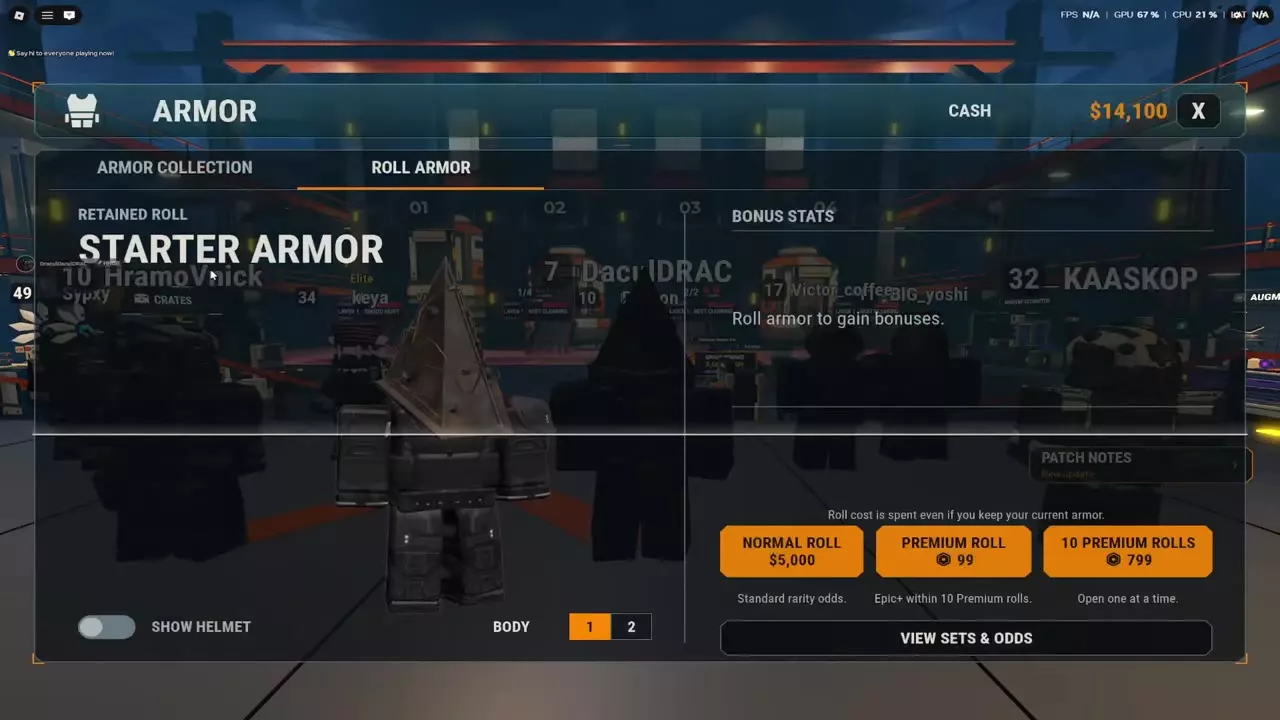
Roll Armor screen with Normal and Premium roll options and the View Sets & Odds button

Armor rolls, storage and appearance

Open Armor > Roll Armor. A Normal Roll costs 5,000 Cash; Premium costs 99 Robux, or 799 Robux for ten. Premium guarantees an Epic or higher set within ten Premium rolls. The fee is spent even if you keep your current armor.

Since November 14, 2026, you can store three rolled sets, buy a fourth slot and switch stored sets at the Armor station. Rolls give an unowned set when possible; duplicates award Cash.

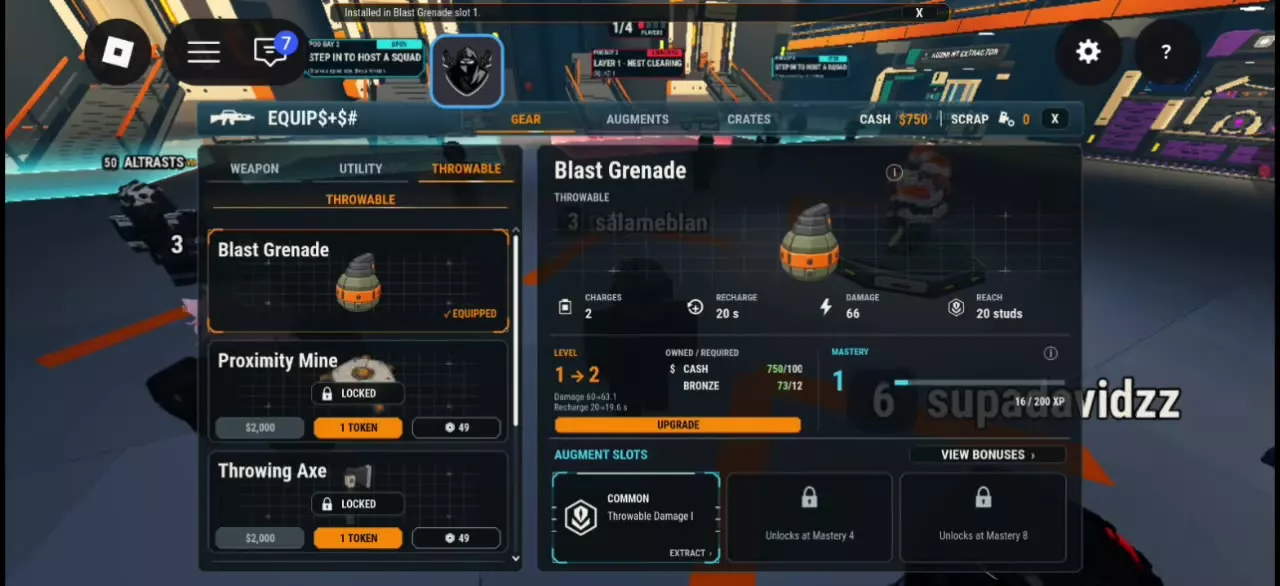
Blast Grenade equipment panel with Extract beneath its installed Throwable Damage I Augment.

Install, extract and reroll Augments

Open Equipment > Augments, select a category-compatible Augment, choose Install, then select equipment and an available slot. An occupied slot offers Compare & Replace.

To move an installed Augment, select Extract in the equipment details and reinstall it on compatible gear. Common through Epic extraction is free; Legendary extraction requires an Extractor.

Rerolls spend Scrap even when you keep the previous result. Lock up to two traits to preserve them, with a higher Scrap fee for locks. Dismantle unwanted Augments for the displayed Scrap return.

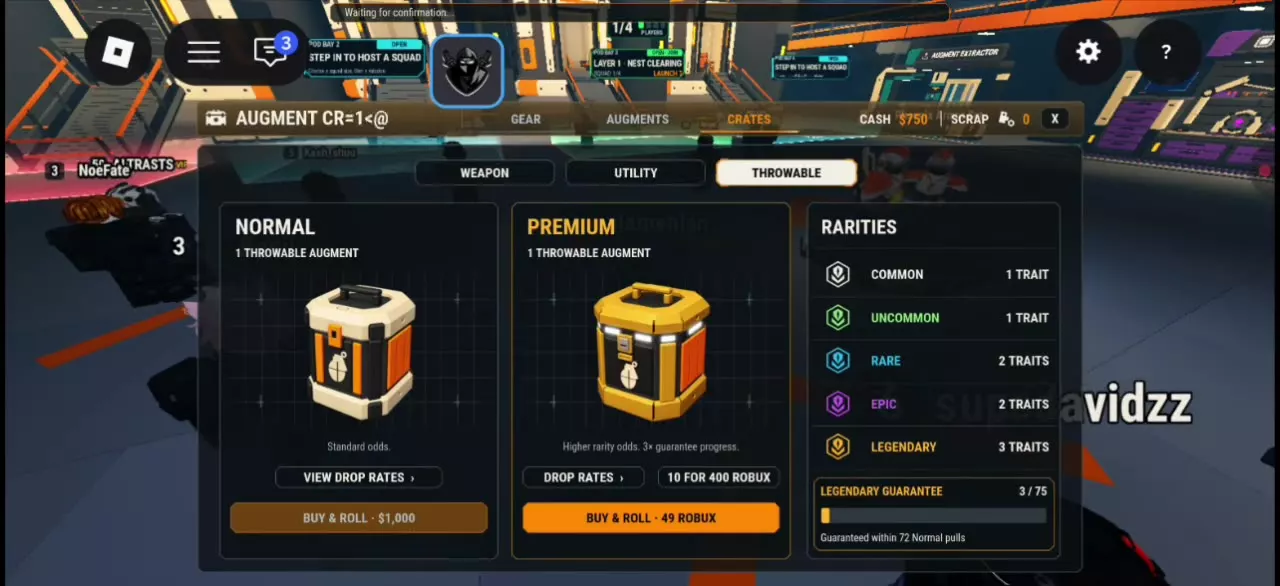
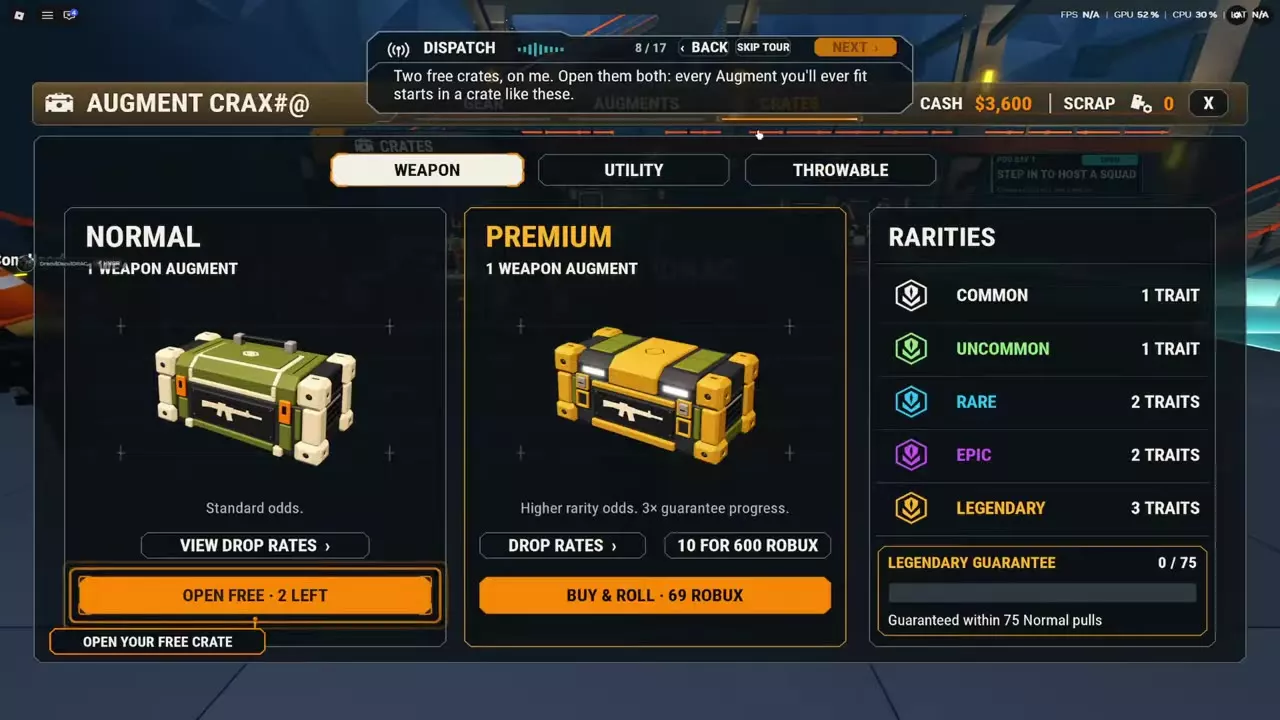
Throwable Crates menu showing Legendary Guarantee at 3/75 and 72 Normal pulls remaining.

Augment Crates and Legendary Guarantee

Open Equipment > Crates and match the category to your equipment. Normal openings use Cash; Premium openings use Robux. Since November 14, 2026, Premium crates cannot give Common Augments.

Weapon, Utility and Throwable crates use a 75-point Legendary Guarantee: a Normal opening adds 1 point, and a Premium opening adds 3 points. Free tour openings count too. Three times the guarantee progress advances the target faster; it does not mean three times the random Legendary chance.

Classes & Ultimates Personal passive bonusSquad passive bonus
Assault 25 %10 %
Engineer 25 %10 %
Scout 15 %6 %
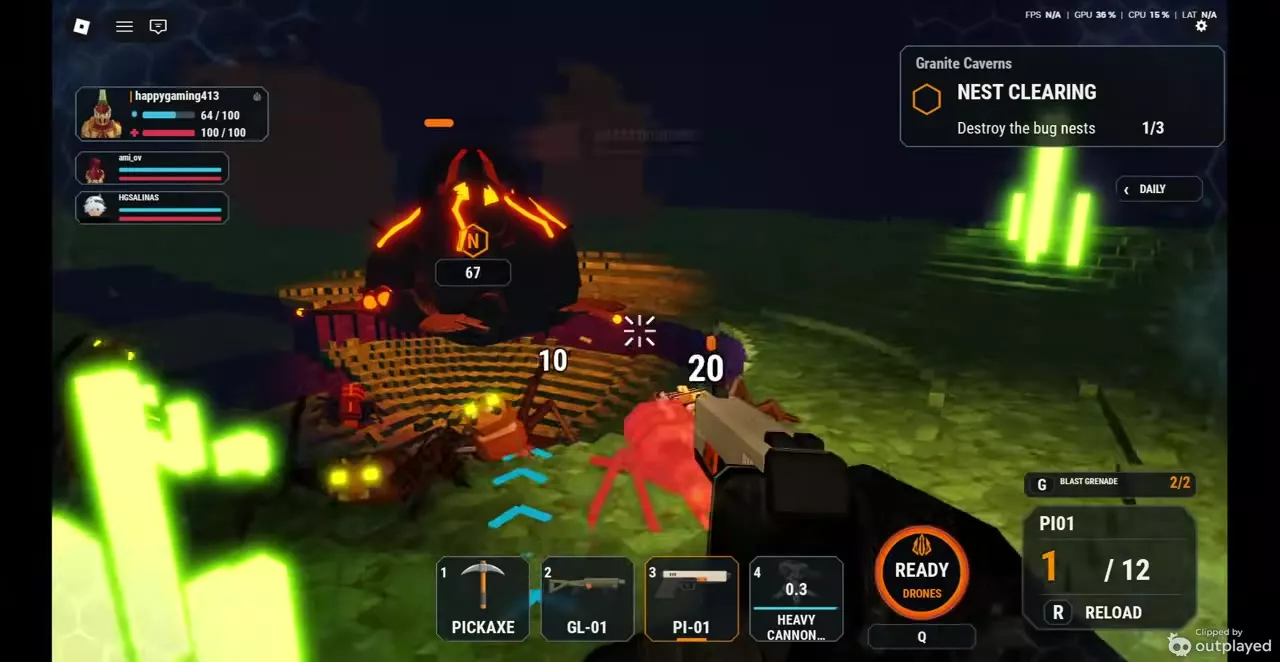
An orange-ridged nest with an N marker and health bar stands behind approaching bugs.

Nest Clearing walkthrough

Follow the blue arrows and N markers, digging through blocked rock with Pickaxe. Attacking a nest draws its brood into the fight: clear bugs threatening your position, then return your fire to the nest.

Confirm NEST DESTROYED and an increased counter before moving on. A Granite Caverns Normal example requires three nests; use your current mission's displayed target. ALL NESTS DESTROYED starts the return-to-pod objective, and surviving bugs remain active during extraction.

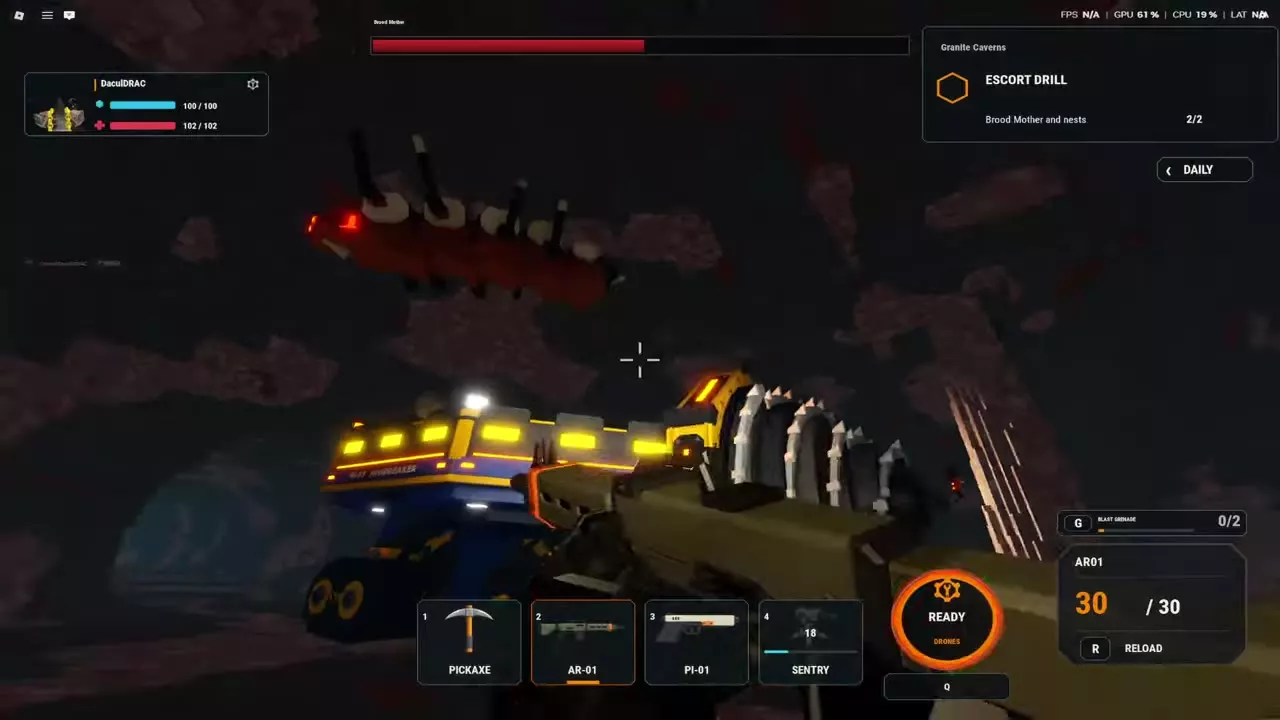
Brood Mother above the drill with an active health bar and 2/2 nests

Escort the Drill walkthrough

  • After ALL ABOARD, press E at the console to start the drill and defend its platform.
  • At cavern stops, destroy the marked nests. Return up the drill's stairs when Get back aboard! appears.
  • If THE DRILL IS DOWN appears, return to its console and repair it. Resume defense after DRILL REPAIRED.

The final nest counter and Brood Mother's health are separate objectives. In the Granite Caverns two-nest encounter, 2/2 nests does not finish the boss fight. Defeat Brood Mother as well, then board the separate extraction pod after THE DRILL IS THROUGH.

The GO countdown runs while the player remains inside the pod facing its open ramp.

How to extract

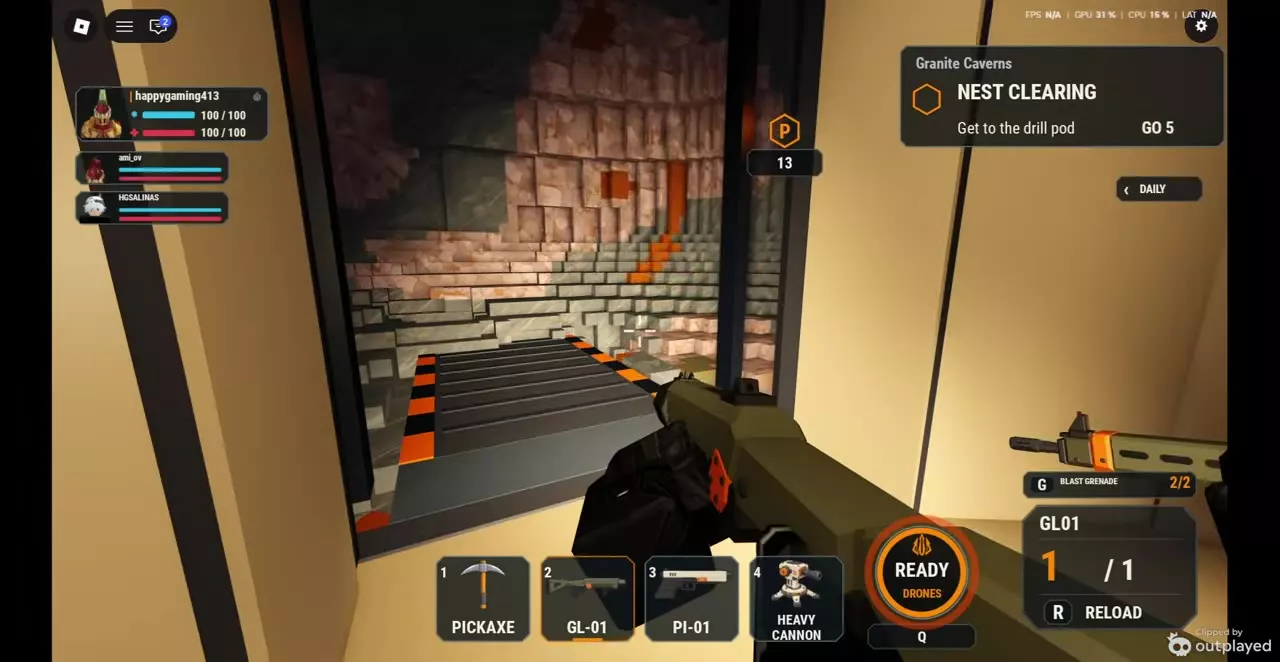
When Get to the drill pod appears, follow the blue ground arrows and orange destination marker. Use Pickaxe to break obstructing rock, defend the destination while the pod arrives and enter when its entrance opens.

Anywhere inside the cabin counts as aboard. Stay inside through GO until the doors close and Extracting appears.

When Complete Mission? is open with teammates still outside, Return to Lobby lets you leave with all your haul while the pod stays for them. Choose Wait to remain.

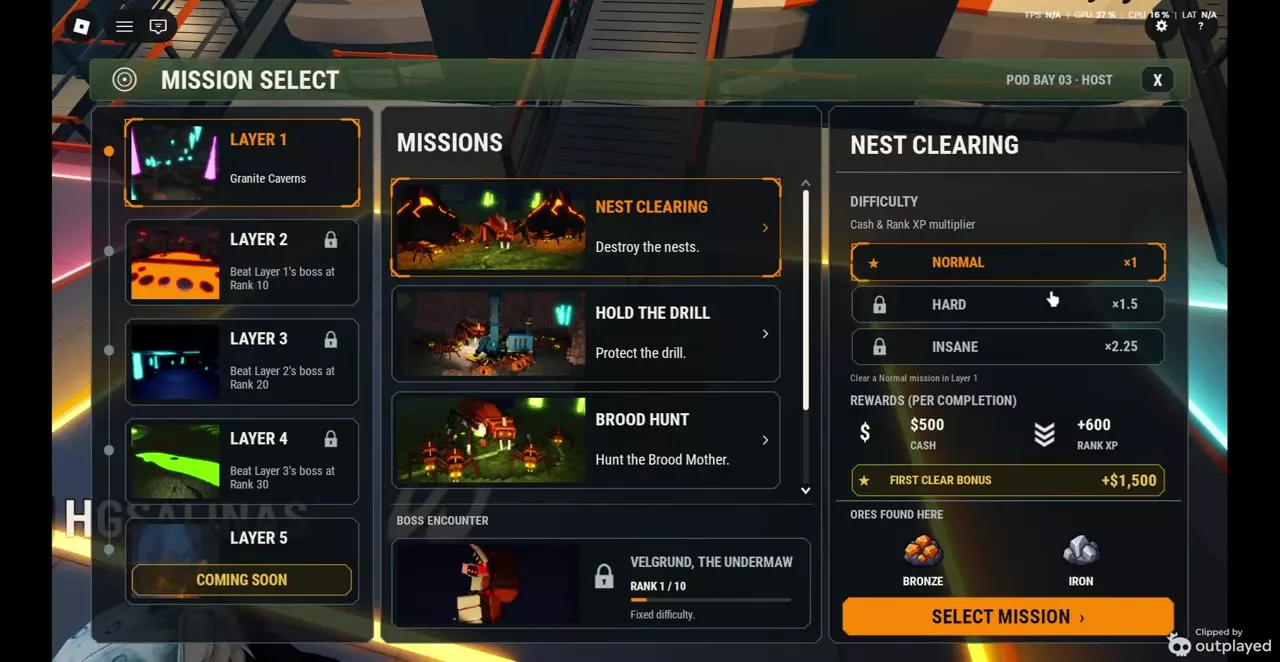
Mission Select showing the layer list and boss and Rank requirements

Cave layers and unlock requirements

To unlock a deeper layer's selection in Mission Select, meet both its Rank requirement and the preceding boss requirement:

  • Layer 2 · Basalt Rifts: Rank 10 and defeat the Layer 1 boss.
  • Layer 3 · Deepstone Hollows: Rank 20 and defeat the Layer 2 boss.
  • Layer 4 · Caustic Sumps: Rank 30 and defeat the Layer 3 boss.

Reaching the Rank alone does not unlock that layer's selection.

Layers LayerRequired Rank
Caustic Sumps 430
Deepstone Hollows 320
Basalt Rifts 210
Granite Caverns 1—
Ores Collection layer
Adamantine 4
Mithril 4
Bronze 1
Iron 1
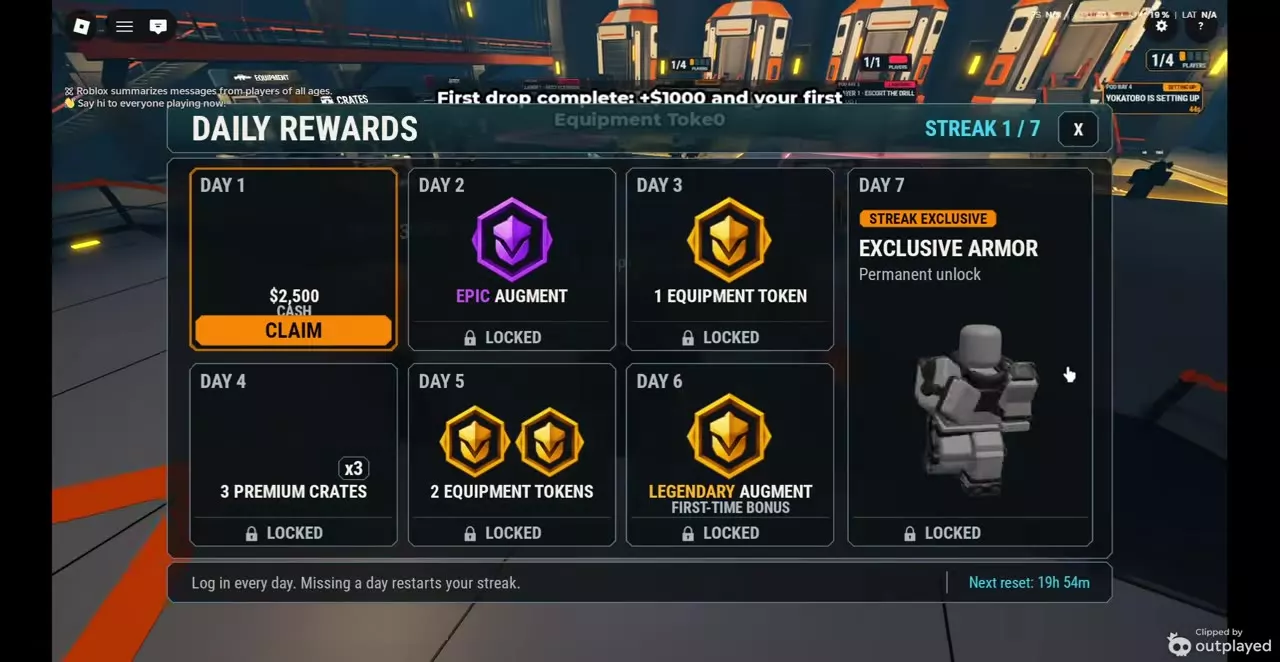
Daily Rewards menu with the Day 1 Cash claim button

How to earn Cash

Collect available first-drop rewards and open Daily Rewards > Claim before choosing your next expedition. For the Group Reward, join To The Earth's Core through the depot stand to receive 2,500 Cash once per account.

Choose missions that advance your Daily Tasks and offer an available first-clear or weekly completion bonus, then complete the objective and extract. A previously cleared mission pays its weekly completion bonus on your first extraction from that mission each week. These mission bonuses reset every Saturday.

Daily & Login Rewards

All pages →↑ Browse
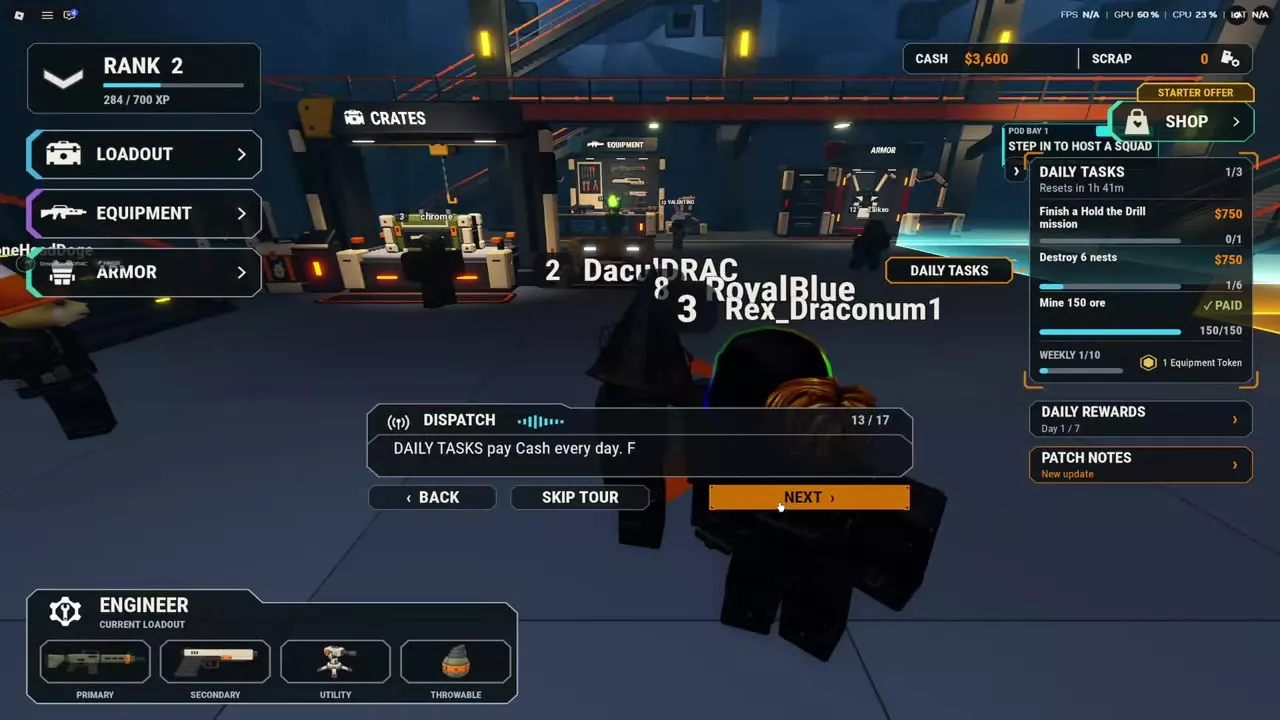
Daily Tasks panel in the lobby showing objectives, progress, Cash rewards and a reset countdown

Daily Tasks and weekly Token milestones

Check the depot's three Daily Tasks, their progress and the reset countdown. Choose missions that advance the assigned objectives; completed tasks display PAID.

Cash per completed task is 750 at Rank 1, 1,250 at Rank 25 and 2,000 at Rank 50.

The Weekly counter tracks completed Daily Tasks: five earn one Equipment Token, and ten earn another, for two total. A single task requiring two mission completions still counts as one Daily Task. This counter is separate from weekly mission completion bonuses.

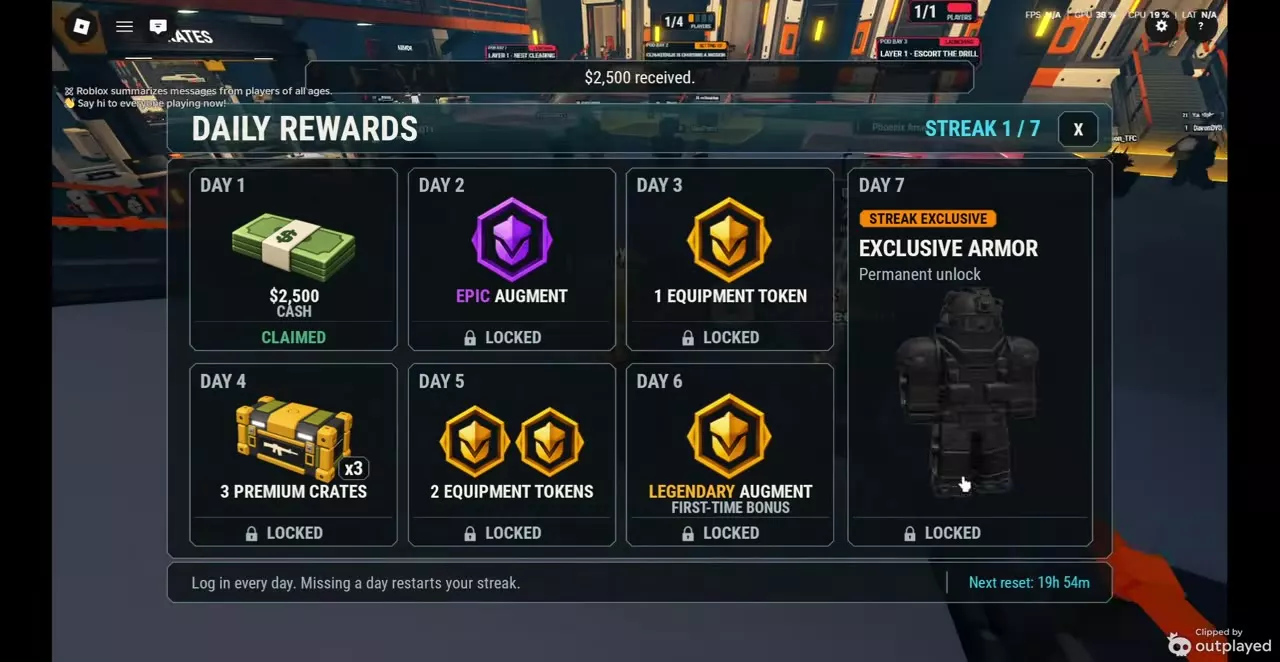
Daily Rewards menu showing Day 1 claimed and the 2,500 Cash receipt

Seven-day login rewards

Log in on consecutive days and open Daily Rewards to claim each available reward. Missing a login day resets the streak.

Day 2 gives an Epic Augment: install it on compatible gear now and transfer it later through free extraction. Day 6 gives a Legendary Augment labeled First-Time Bonus. Day 7 permanently unlocks Exclusive Armor.

Game Passes Price
VIP 199 Robux
Mastery Booster 199 Robux
Tech Viking 399 Robux
Tech Ninja 399 Robux
Phoenix Armor 799 Robux
MG-03 equipped against approaching bugs, with its HEAT bar and the full loadout visible.

Solo Layer 1 Insane Nest Clearing loadout

A completed solo Layer 1 Insane Nest Clearing setup used MG-03 Level 13, FT-03 Level 10, Dome Shield Level 18 and Lure Beacon Level 16, plus Pickaxe. Each combat item had three installed Augments; FT-03's configuration included Sidearm I.

Alternate MG-03 gunfire with FT-03 flames during cooling. Throw Lure Beacon to draw small bugs away from your route, and deploy Dome Shield while fighting or digging forward. After completing the nest target, use the opening to reach extraction.

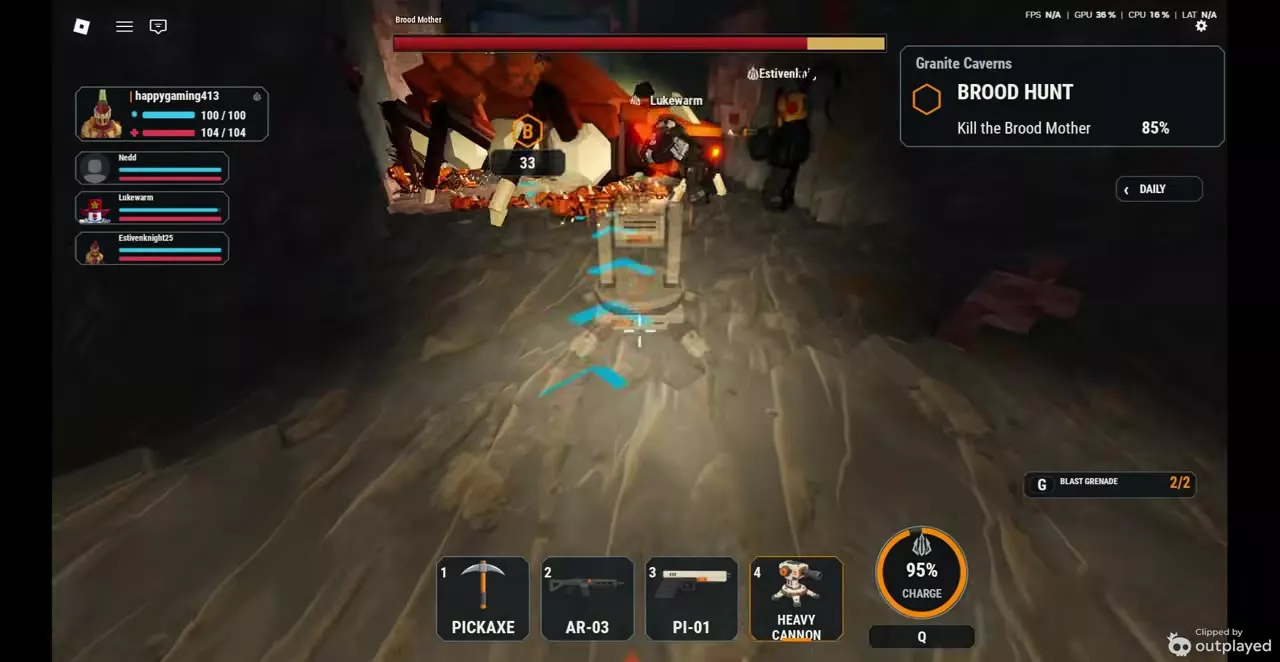
Heavy Cannon placement preview during Brood Hunt, with AR-03 and PI-01 in the loadout.

Boss loadouts: damage, support and armor choices

For an early Brood Mother setup, pair AR-03 and PI-01 with Heavy Cannon. Use your rifle for repeated boss attacks and the cannon for explosive support against nearby bugs, then return your aim to the boss after clearing immediate threats.

Keep these support limits in mind:

  • Lure Beacon does not attract the boss. Use it to redirect small bugs.
  • Blast Grenade's extra 10% maximum-health damage excludes bosses. Apply that effect to surrounding non-boss bugs.
  • Boss hits shorten Dome Shield's remaining duration, and bugs can climb over it. Continue moving and fighting around the barrier.

Tier Lists