
Into The Hive controls and settings
Last updated:
Find the keys for movement, combat and equipment, then adjust your camera, effects, sound and navigation settings.
Use WASD to move, left-click to fire, right-click to aim, R to reload and V to switch camera views. G uses your throwable; Q activates your ultimate when it reads READY. Open Settings > Controls for camera sensitivity and hotbar slots, Visuals for effects and camera motion, Audio for volume, and Other for HUD scale, Tips and Path arrows. On phones and tablets, enable Aim Assist in Settings.
Keyboard and mouse controls
| Action | Control | Context |
|---|---|---|
| Move | WASD | During play |
| Fire | Left mouse button | Gun equipped |
| Aim | Right mouse button | Gun equipped |
| Reload | R | Gun equipped |
| Mine or dig | Left mouse button | Pickaxe equipped |
| Place Sentry | Left mouse button | Sentry selected |
| Switch camera view | V | During play |
| Use throwable | G | Equipped throwable |
| Activate ultimate | Q | Indicator reads READY |
Left-click acts on the item you are holding. Select a gun to shoot, Pickaxe to break ore or terrain, or Sentry to place the turret on the ground. Repeated Pickaxe strikes remove blocks to open a passage.
Default equipment keys
| Key | Default slot | Tutorial equipment |
|---|---|---|
| 1 | Demolition | Pickaxe |
| 2 | Primary | AR-01 |
| 3 | Secondary | PI-01 |
| 4 | Utility | Sentry |
The Demolition slot supports Pickaxe, Drill or C4. Equipment selection keys follow your hotbar arrangement; after rearranging items, use the key shown beside the item.
With the starting guns, press 2 to draw AR-01 or 3 to draw PI-01. Right-click to aim at distant enemies. Press R during a break in combat to refill the magazine before the next fight; you can reload before it is empty.
Camera view and sensitivity
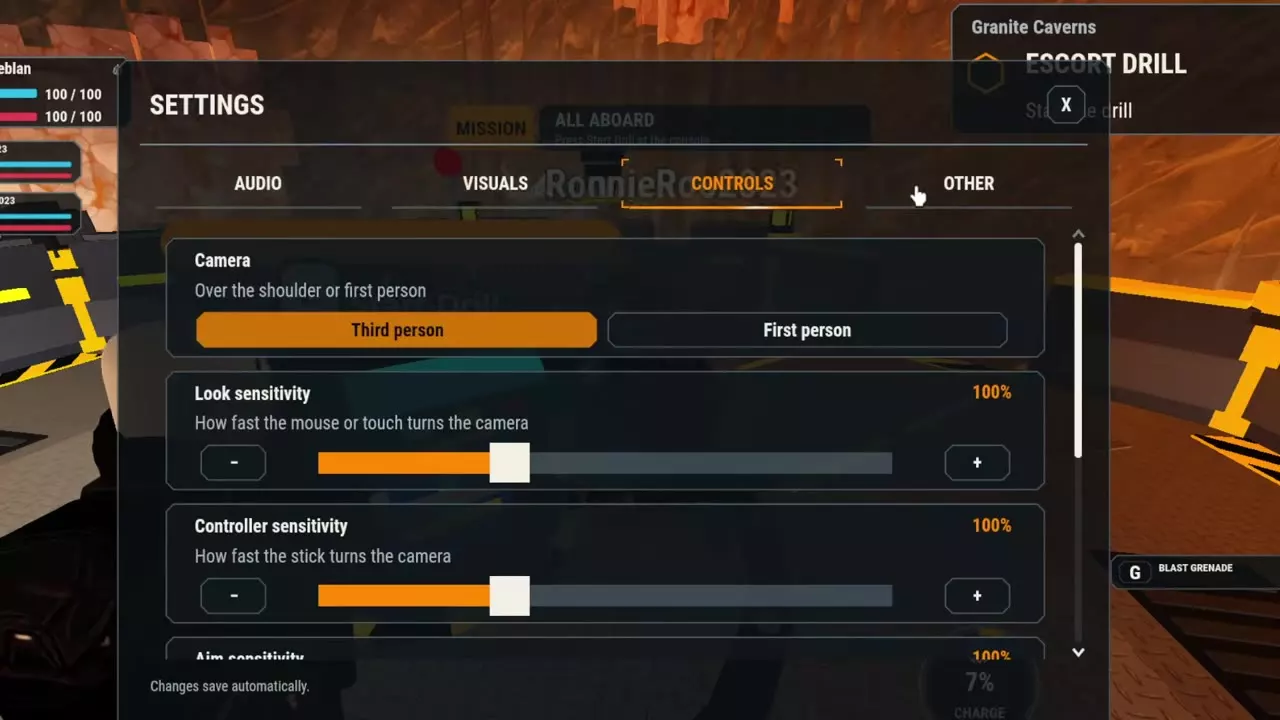
At the initial selection screen, select First Person or Third Person, then confirm with Choose a View. During play, press V to switch perspectives, or open Settings > Controls > Camera and select your view.
Adjust sensitivity under Settings > Controls:
| Setting | Input | Effect |
|---|---|---|
| Look sensitivity | Mouse or touch | Camera turning speed |
| Controller sensitivity | Controller stick | Camera turning speed |
Lower the setting for your input if turning overshoots your target; raise it if turning feels too slow.
Melee weapons automatically switch the camera to third person. Disable that behavior in Settings to keep your selected perspective while using melee weapons.
Hotbar slots and mobile Aim Assist
Change hotbar slots
- Open Settings > Controls.
- Choose the hotbar slot for each item.
- Use the key associated with its new position.
An item's selection key changes with its hotbar position. Read the updated hotbar when switching weapons or tools after rearranging your equipment.
Enable mobile Aim Assist
On a phone or tablet, open Settings and enable Aim Assist.
Visual effects and camera motion
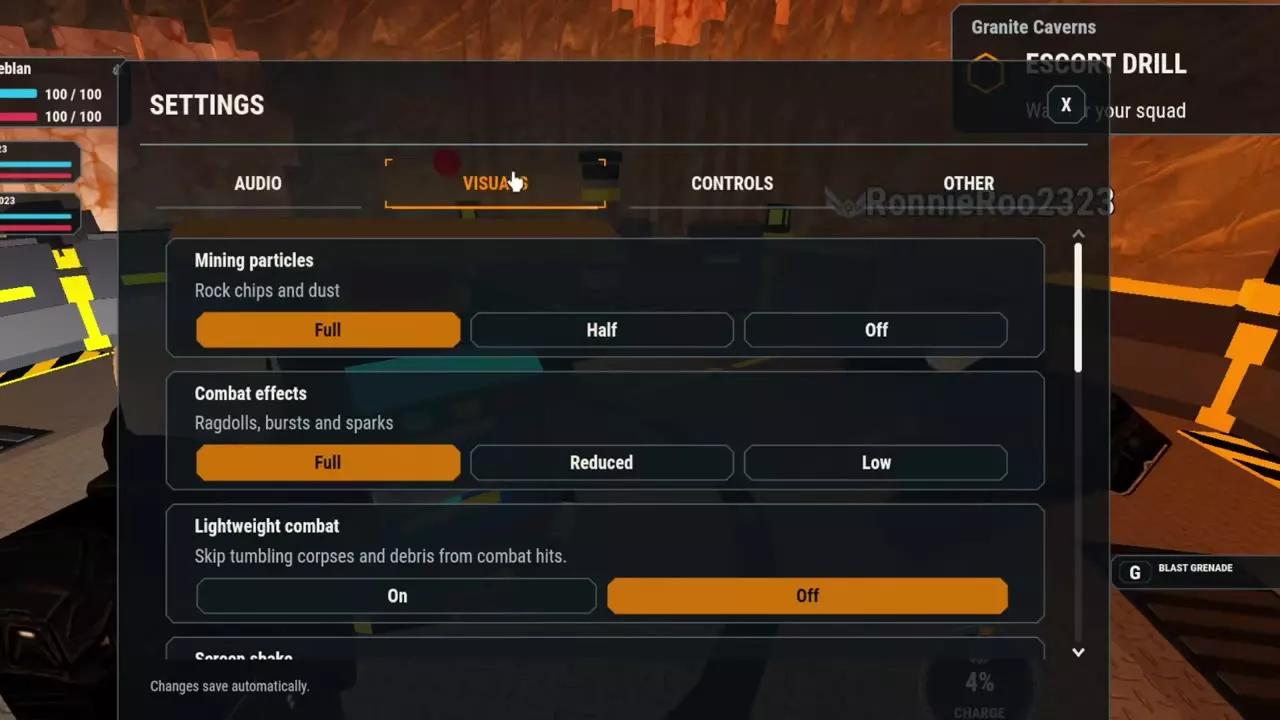
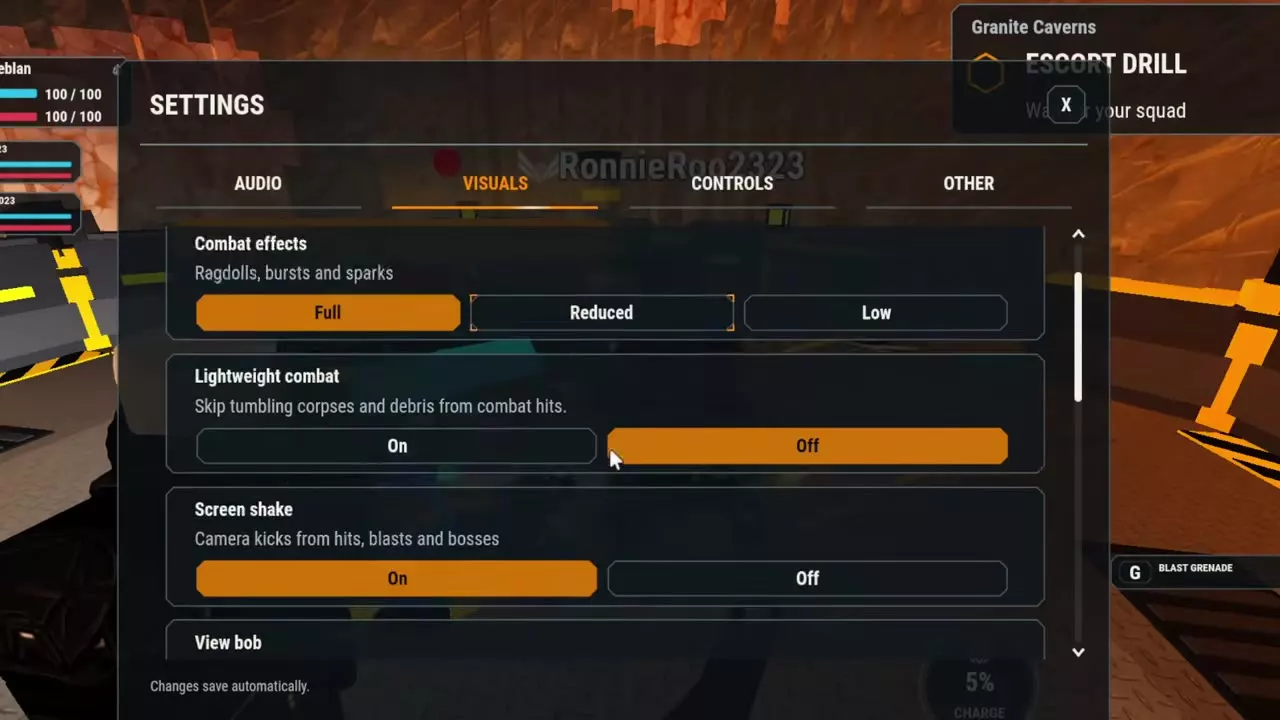
Open Settings > Visuals and scroll to the option you want to change. Settings save automatically.
Mining particles and combat debris
| Setting | Options | Affects |
|---|---|---|
| Mining particles | Full / Half / Off | Rock chips and dust |
| Combat effects | Full / Reduced / Low | Ragdolls, bursts and sparks |
| Lightweight combat | On / Off | Tumbling corpses and hit debris |
Choose Half or Off for Mining particles to reduce debris while digging. Lower Combat effects to Reduced or Low for less combat clutter. Turn Lightweight combat On to skip tumbling corpses and debris from combat hits.
Screen shake, View bob and field of view
- Screen shake controls camera kicks from hits, explosions and bosses. Set it to Off to disable those shakes.
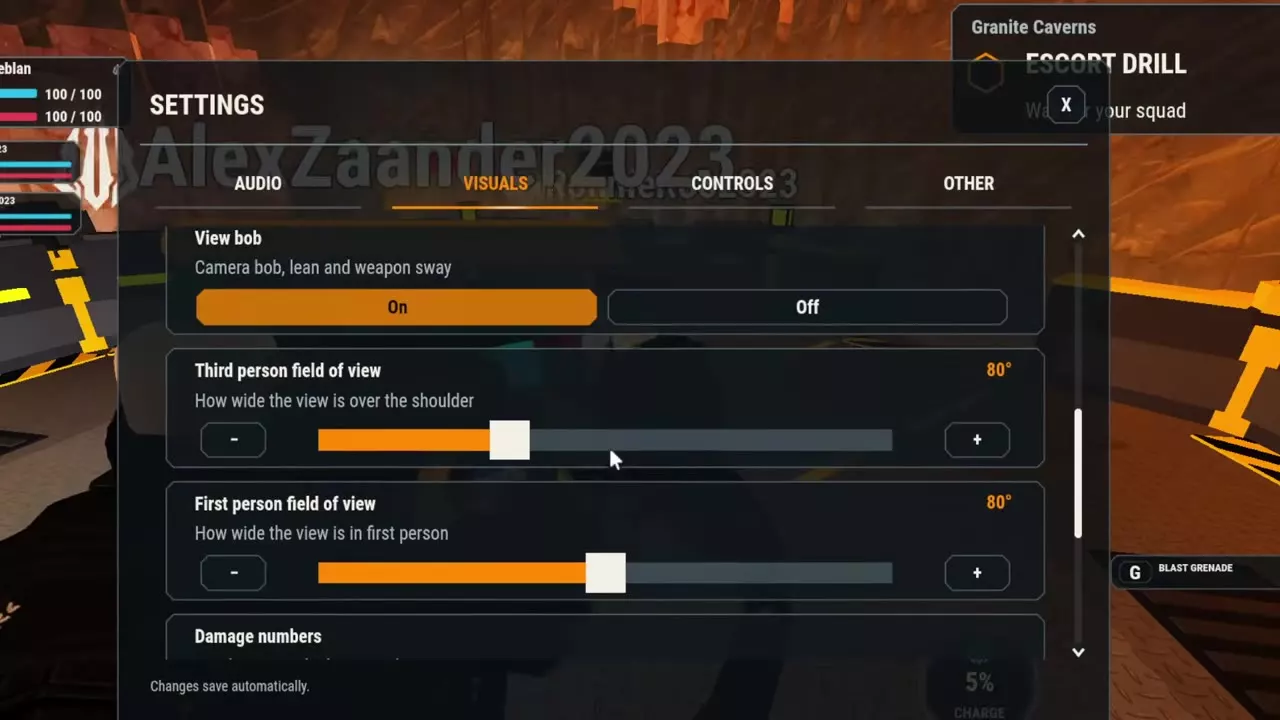
- View bob controls camera bobbing, leaning and weapon sway. Set it to Off for a steadier view while moving.
- Third person field of view adjusts the width of the over-the-shoulder view.
- First person field of view adjusts the width of the first-person view.
Adjust each field of view separately if you use both perspectives. For less camera motion and menu animation, turn Screen shake and View bob off, then enable Reduce menu motion.
Damage feedback and menu animation
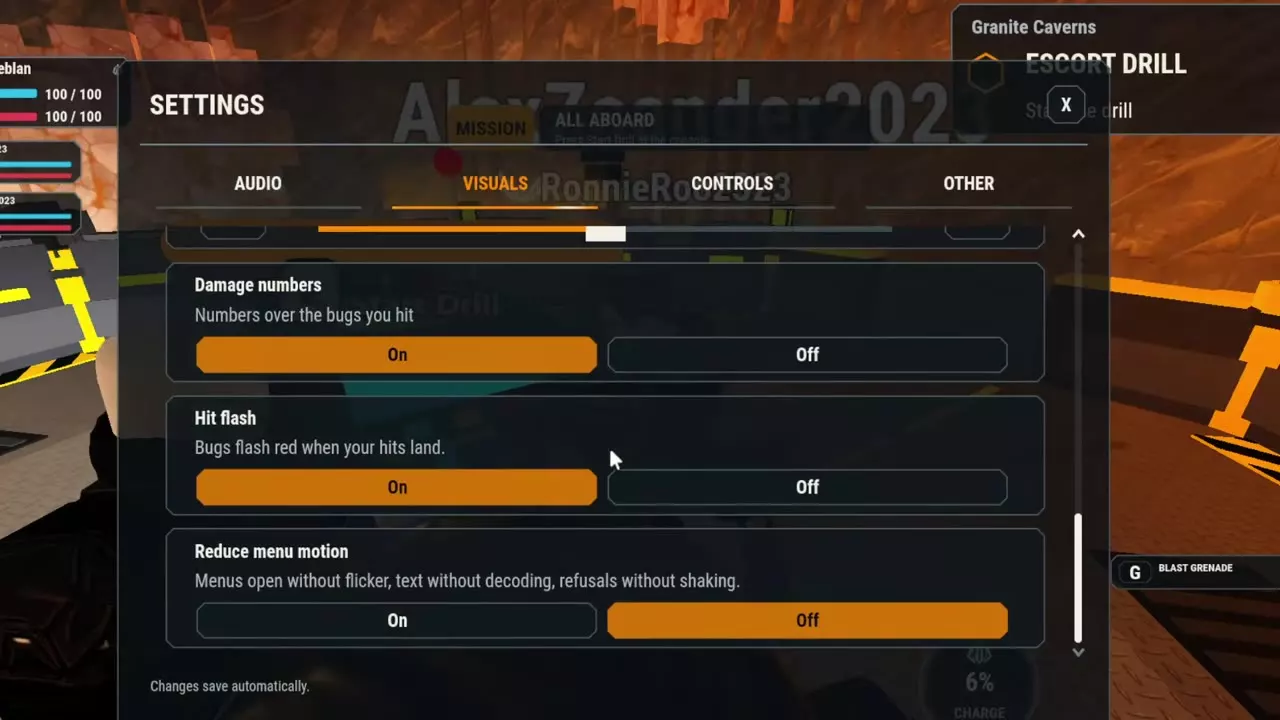
- Damage numbers toggles the numbers above bugs when you hit them.
- Status damage numbers for fire, bleed and shock use separate colors and can be toggled in Settings.
- Hit flash toggles the red flash on bugs when attacks land.
- Reduce menu motion removes menu flicker, text decoding animation and shaking rejection prompts.
Keep damage numbers enabled when you want numerical hit feedback. Hit flash provides a separate visual cue that an attack connected.
Audio, HUD and tips
Audio channels
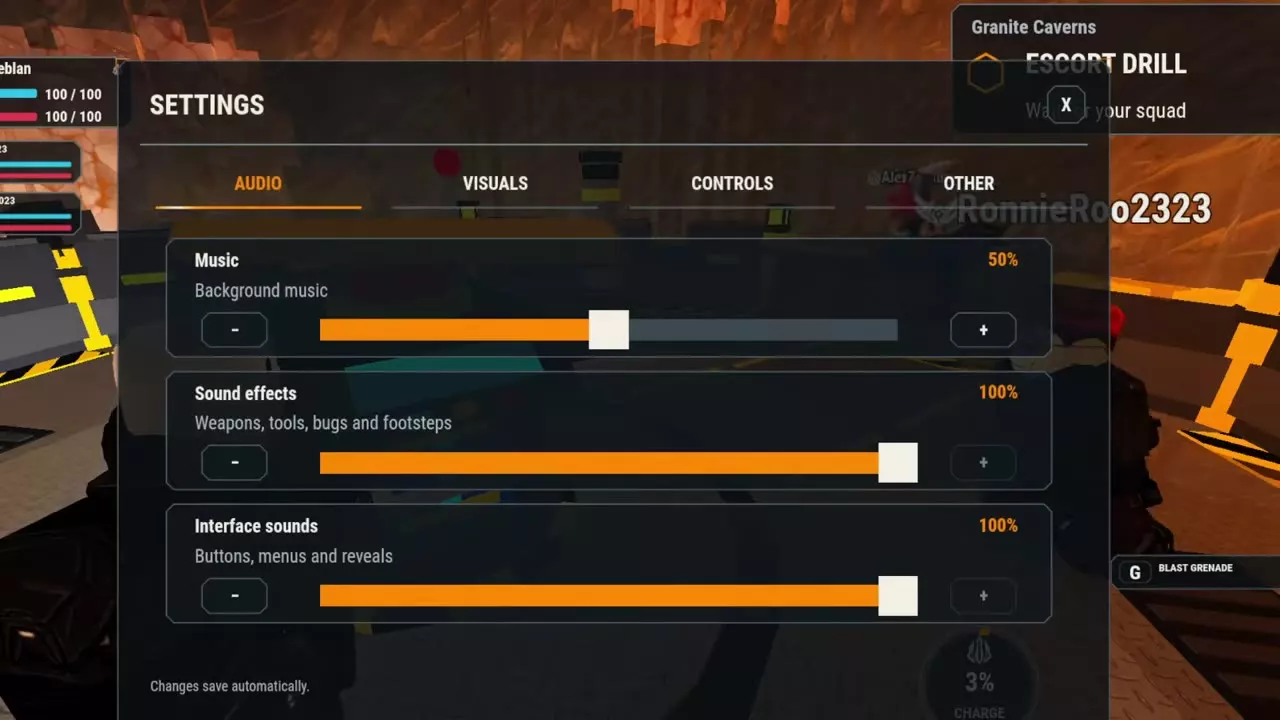
Open Settings > Audio to adjust these volumes separately:
| Setting | Sounds |
|---|---|
| Music | Background music |
| Sound effects | Weapons, tools, bugs and footsteps |
| Interface sounds | Buttons, menus and reveals |
Lower Music if you want quieter background music while keeping gameplay sounds at their current volume. Adjust Interface sounds separately to quiet menu feedback. Changes save automatically.
HUD scale and early control prompts
Open Settings > Other:
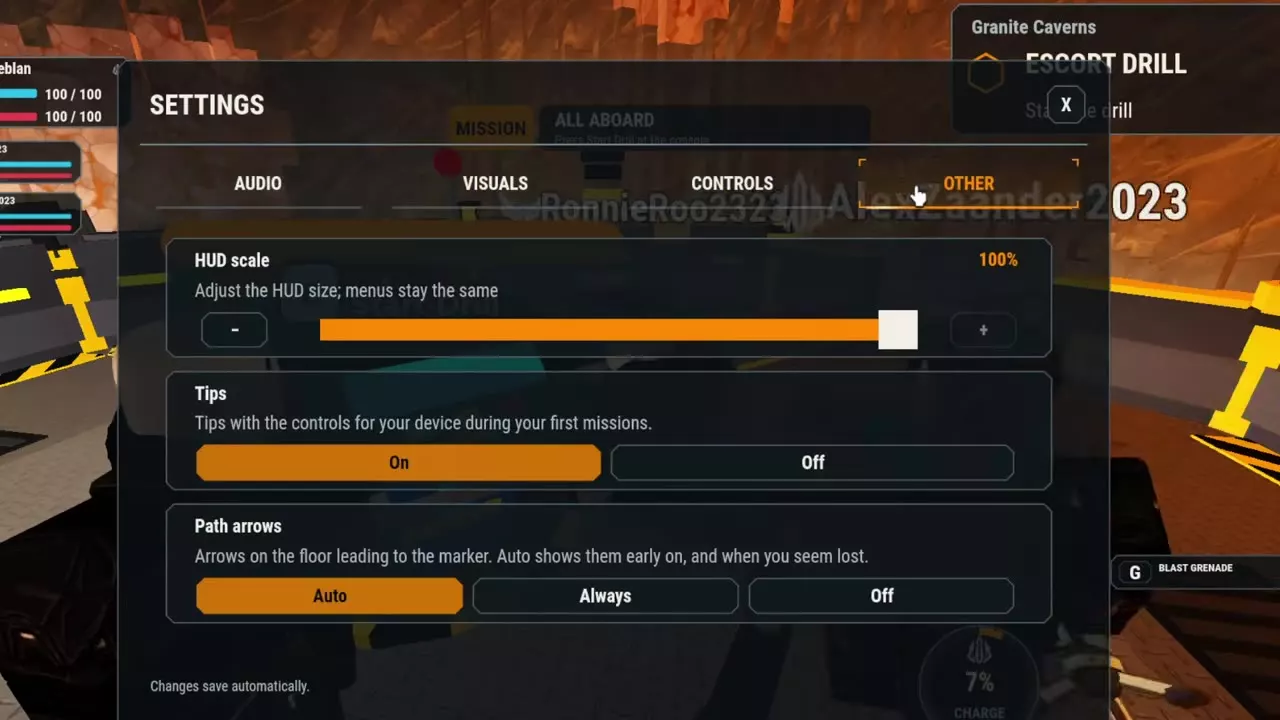
- HUD scale changes the size of the gameplay HUD. Menus stay the same size.
- Tips controls device-specific control prompts during your first few missions. Keep it on while learning your device's controls, or turn it off to hide those prompts.
Path arrows
Open Settings > Other > Path arrows and select a navigation mode.
| Mode | Ground guidance |
|---|---|
| Auto | Early play and when lost |
| Always | Persistent arrows |
| Off | No route arrows |
Auto displays arrows early in play and when the game detects that you are lost. Choose Always if you want continuous guidance through cave passages. Choose Off to navigate without ground arrows.
Follow the blue arrows on the ground toward the current objective marker. During extraction, use them together with the orange objective marker to head toward the pod.
Combat and extraction
- Weapon types and firing mechanics explains weapon-specific attacks, sustained fire, cooling and melee special actions.
- Damage, firing stats and status effects explains weapon statistics, conditional damage and combat status effects.
- How to extract covers reaching the pod, waiting for it to open and staying aboard until departure.